The Leica SL. A Field Report by Jono Slack. October 2015

The Leicaflex SL and SL2 were manufactured by Leica in Wetzlar from 1968 to 1976, they are reputed to be the best made cameras in the history of photography. Despite being around twice the price of the equivalent Nikon F2 Photomic, Leica nevertheless made a loss on every camera produced.

In 1976 production was stopped, and the next R mount camera was the R3, which was based on the Minolta XE-1/XE-7 camera, this was first built in Wetzlar, and later in Portugal. Leica had been doing research on auto-focus for about 20 years and the project was called Correfot, the first prototypes were based around the Leicaflex SL2, later ones around the R3 and R4 (as an interesting side note, 5 Correfot prototypes were sold in the Westlicht auction on Dec. 5, 2009, Lot # 229 which sold for €50K). However Leica didn’t see a future in AF, and sold the technology to Minolta, who, in 1985 brought out the Minolta Maxxum 7000: the worlds first autofocus camera.

1
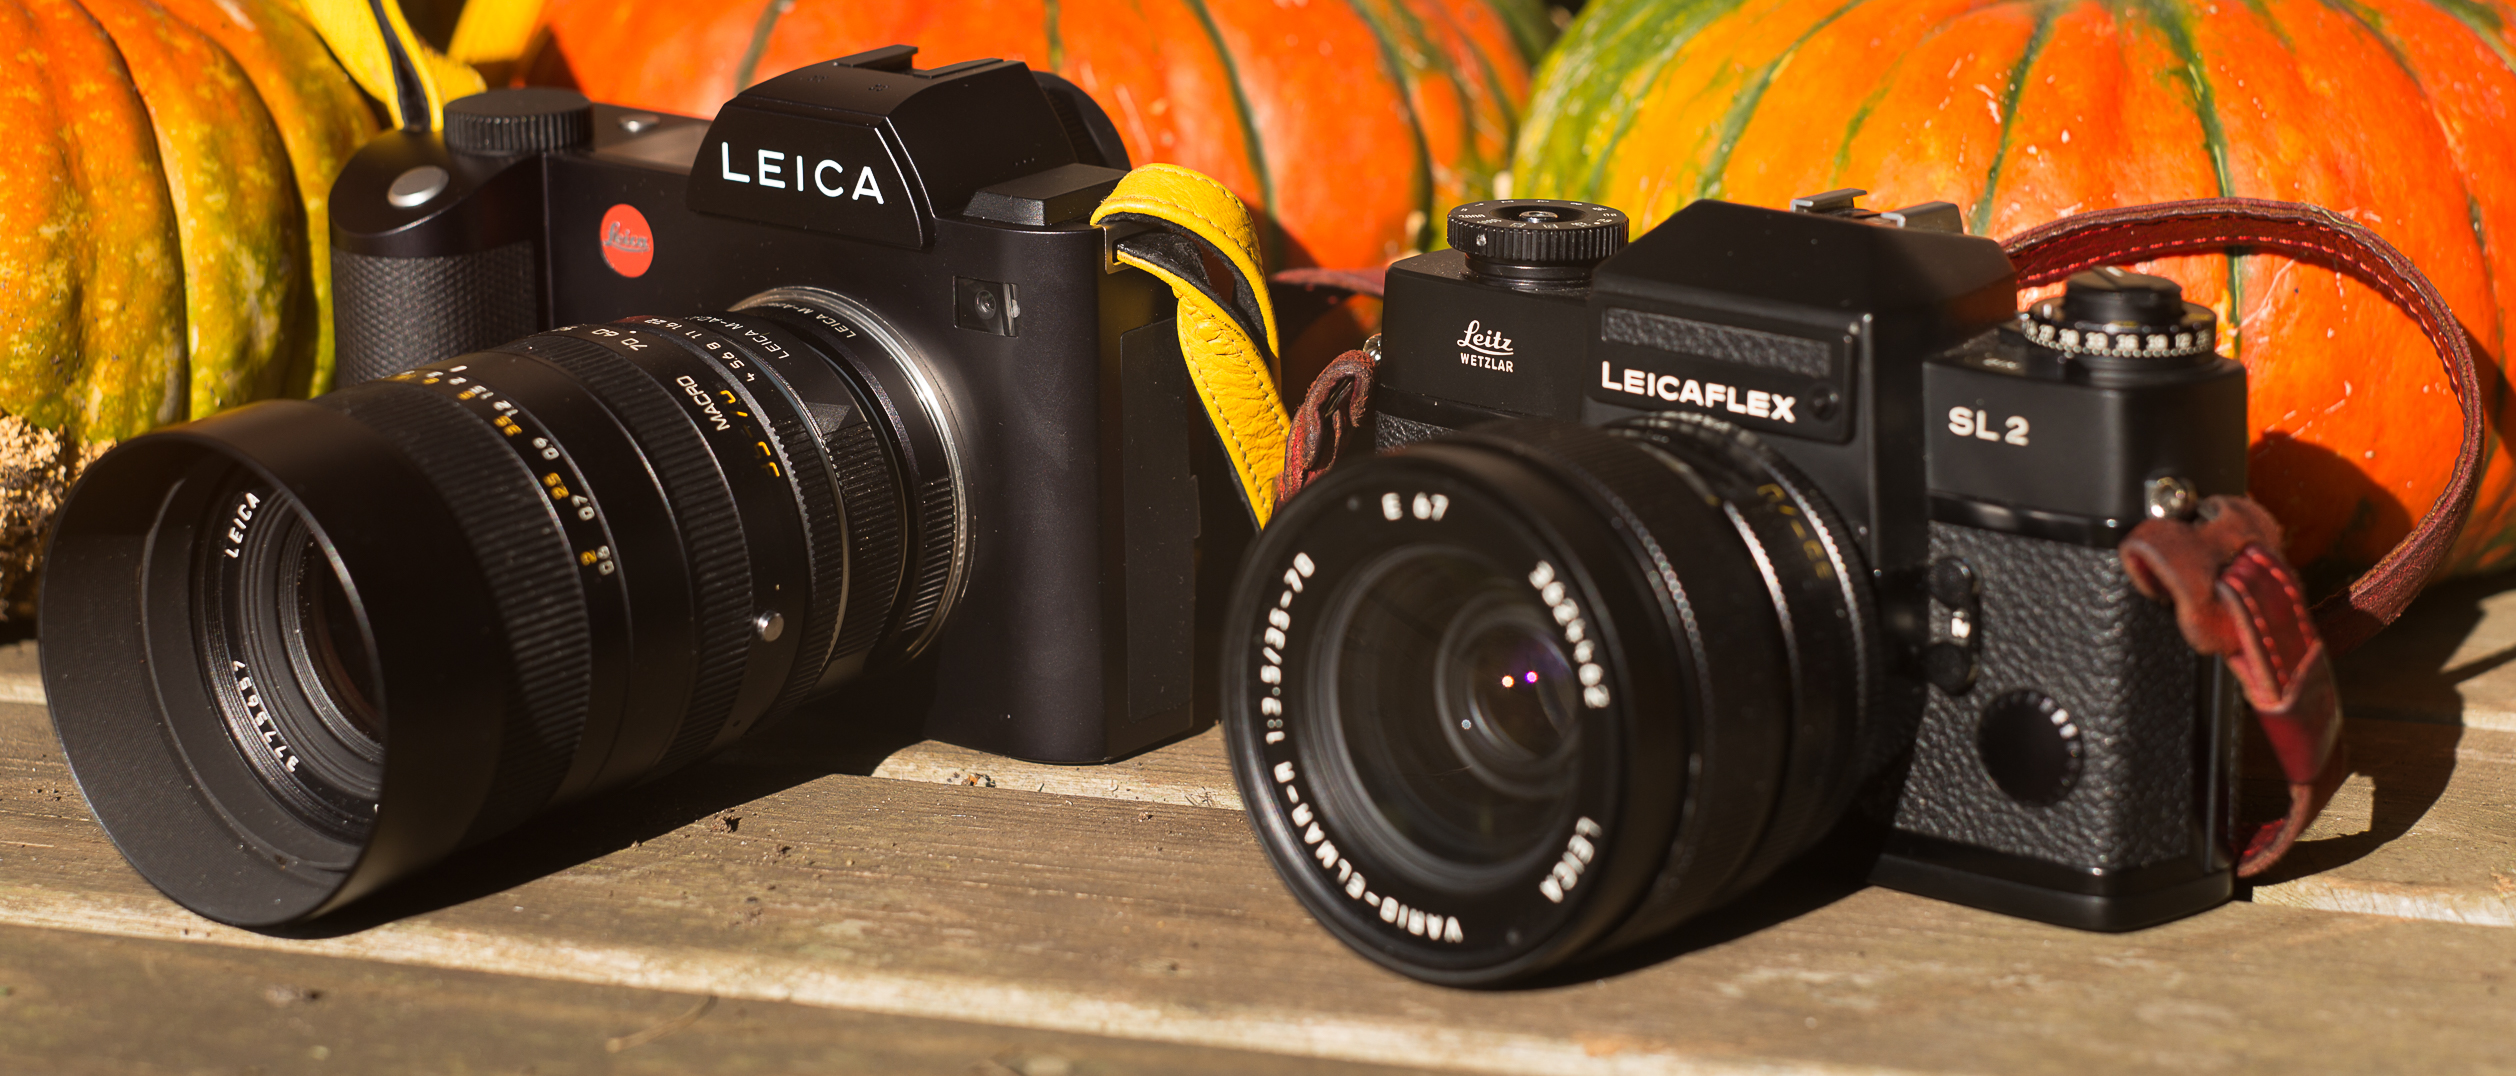
This August Andreas Kaufmann posted a photograph on Facebook of Lenny Kravitz shooting with a Leicaflex SL, I thought this was delightfully oblique, and it prompted me to buy a Leicaflex SL2 secondhand at a very modest price, it’s wonderfully made and just lovely to use, and my 41 year old beauty is still working perfectly.

2

Sfakian Sunrise Leica SL with Leica Vario Elmar T 55-135 ISO 50

Of course, the Leica SL might also be construed as Leica S L(ight), and the new camera does indeed take full advantage of the 7 years of in house development and interface design of the Leica S cameras. Added to which, Leica will provide an adapter which provides AF with S lenses.

I’m afraid that I’m as hooked on photographic forums and social media as many photographers. One of the special pleasures for me is to read the rumours about new camera introductions when I already know the truth; sometimes it’s really hard to stop oneself from making comments!

In this case it was particularly tantalising, in that the rumour sites had conflated the idea of a new Leica M with the rumours of a full frame camera with autofocus. Stir in talk of a Leica Q with interchangeable lenses, add a little guesswork (the demise of the Leica T and the re-emergence of a Leica CL) and you can end up with the strangest conclusions. The only thing which I really haven’t seen suggested is what we actually have here; The new Leica SL.

In recent years Sony, Olympus and Panasonic have been the real innovators in camera design, leaving Canon and Nikon to keep refining the single lens reflex camera. Conventional wisdom was that Leica could not compete directly, and needed to focus on niche cameras like the Leica M, where there wasn’t a great deal of direct competition. The Leica Q changed all that, outdoing the Sony RX1 on every level, it’s a stunning camera.

The Leica SL has a similar relationship to the Sony A7 cameras as the Leica Q had to the RX1 cameras; it’s clearly an attempt to produce a camera which is better on every level relevant to the real photographer, whilst maintaining Das Wesentliche – the essence and leaving out unnecessary complications.

Whilst the Leicaflex represented the first appearance of the Leica R mount, it’s worth a small mention of the Leica R10, which was the last appearance of the R mount, and which was  abandoned in 2009 because Leica felt they could not compete with Canon and Nikon in terms of autofocus and price. At the time Leica did promise that they would produce some kind of digital R solution, although they didn’t reveal what or when. I think it’s delightfully elliptical that the new Leica SL is certainly that solution.

3

Lemon Leica SL with Macro Elmarit R 60mm ISO 125

The Camera

When Sony released the A7, it was clearly a response to a public desire for a full frame mirrorless camera, and indeed, they have produced a series of great cameras, which have improved incrementally with each new release. They decided on continuity with the E mount, which they had developed for the excellent range of NEX APSc (cropped frame) cameras. However, the E mount is rather narrow for full frame, and there are technical problems with respect to this (especially if you want to use it with Leica M lenses).

When Leica developed the T mount for the Leica T APSc camera, they were very aware that it should also be optimum for full frame cameras, and indeed, the T mount is fractionally larger than the R mount (and noticeably larger than the Sony E mount).

Sony E Mount: 46mm

Leica R mount: 49mm

Leica T mount: 50mm

(nb – these are my measurements)

Although Leica have specialised in small and excellent full frame manual focus lenses over the decades, it isn’t really feasible to produce equally small high quality auto-focus lenses with built in motors (especially zoom and telephoto lenses), and if you can’t produce small lenses, then it’s not really relevant to produce small bodies.

The Leica SL is not a small camera, and clearly it’s not intended to be, but it’s interesting to compare its dimensions with the Leicaflex SL2 (I don’t have an SL!)

Leica SL

width 145mm

depth 36mm

height 103mm

weight 900 gm with batteries

Leicaflex SL2

width 146mm

depth 39mm

height 94mm

weight 818 grm (with batteries)

4

Kate and Scarlett Leica SL with Leica Vario Elmarit f2.8-f4 24-90 ISO 2000

This camera is touching base with history, but first and foremost it is a cutting edge digital camera: It is the first EVF based camera which has really been designed with the requirements of the professional in mind. The design might hark back to the Leicaflex, but it is inherently modern, with design features from the Leica T, S and Q merging into a kind of Bauhaus industrial chic. Like most really good designs it’s surprising at first sight, but quickly insinuates itself into your consciousness.

This article is based on two periods with different prototype cameras, the first was from June 23rd until July 13th, when I had the 24-90 zoom, and a second period with a more advanced prototype from August 27th until October 1st, this time I had no native lenses, so I was shooting with Leica M, R and T lenses.

You should bear in mind that images are taken with early versions of the firmware, and that there are plenty of changes in the production firmware. Having said this, even my prototype camera was remarkably reliable – no hangups and no serious bugs.

5

Fisherman Leica SL with Leica APO Summicron M 75mm, ISO 100

Body and Controls

Well, it’s like an S light! It’s been interesting having an S007 in between the two periods with the SL: the whole concept is the same, but there are of course differences, for instance, the SL has a touch screen for replaying images and for touch focus (but not for navigating menus).

The body itself really feels like it’s built out of a single block of metal – in fact, it looks as if there are two pieces (front and back). Without question it’s the best made camera I’ve ever used, The Leica S is very solid (and so is the M) but this is even more convincing. The weather sealing is absolute (I shot nearly 1000 images in a 4 hour event with the 24-90 zoom, in pouring rain with no protection).

I think it’s very funny that there are no words on the top plate or the back of the SL . . . except on the On/Off switch, which is clearly labelled. I suppose it does make sense in that almost everything else is configurable, but it seems odd to assume that the user can manage all the interface without help . . . but might need assistance turning the camera on and off!

6

Leica SL

7

Clematis Leica SL with Leica Macro Elmarit R f2.8 60mm ISO 125

The Back

There is a large high quality LCD with 4 unnamed buttons at each corner.

A short touch of any button will bring up the options relating to it:

Top Left = Menu options

Bottom Left = magnify

top right = play

bottom right = info.

By default, when looking through the EVF, the top left button is disabled (to help avoid nose control). If you like nose control, then you can re-enable it.

8Choosing the top left takes you to the different menu levels, and the buttons change so that:

Top Left = Camera menu

Bottom Left = Image menu

top Right = favourites menu (you can choose what is in it)

bottom right = Setup menu

A long press of any of the buttons brings up one of the following (you can configure it as you like)

Drive Mode

Focus Mode

AF mode

AF Field Size

Exposure metering

Exposure compensation

Exposure bracketing

Interval Mode

Key Lock

Focus Limit (macro)

ISO

White Balance

Grey Card

Format

Lens Profile

Just next to the Viewfinder is the EVF button – this is eminently sensible and toggles through 3 settings:

EVF only

LCD only

Both (EVF actuated through eye contact)

9

Love Leica SL with Leica Vario Elmar R, 35-70 F4 ISO 50

To the right is a joy stick which, like the one on Leica S, can be used to scroll through menus (where pressing it acts as confirmation) , or to zoom in to 100% in review mode (a single press) and to move around the magnified image . On The SL it can also be used to move the zoom/focus point around the EVF/LFD for accurate focusing.

The dial on the back plate, like the Leica M, offers thumb support, but also serves to change aperture in aperture priority and manual mode. Press and turn and it’s the mode button to change between Aperture priority, Shutter Priority, Manual and Program mode (just like the Leica S).

10

Talking with Uncle Saul Leica SL with Leica Apo Summicron M f2 50mm ISO 1000

The Top Plate

The LCD on the top plate gives all the necessary information, and is readable in the brightest sunlight (indeed, more readable in bright light). There are Two buttons, for Live View and Video (which should be configurable, but aren’t yet). The top dial is for shutter speed, and for zooming in playback mode,

The viewfinder has a diopter adjustment, which is nicely stiff, and has a visible dial, so you can see what’s set and go back there if it get’s disturbed or changed (which didn’t happen to me).

Then there is the shutter release, which is perfectly measured, with a half stop to save the exposure, and full detent for taking the picture. The shutter is lovely – quiet and subtle, it might be the nicest shutter I’ve ever used, and of course, together with the mass of the body it allows hand holding at very slow shutter speeds

On the left hand side is a small bump, which presumably holds the GPS sensor and the WiFi connections. The GPS works really well, but the Wifi apps and connectivity were not finished at the time of writing.

The Front

The only control on the front of the camera is the function button. This defaults as a depth of field preview when using AF lenses, but can also be configured with the same options as the long press on the rear buttons.

The Ports

On the left hand side of the camera is a rubber cover, which opens to reveal ports for Flash, Microphone/headphones/remote, HDMI and USB 3.

On the right hand side is the SD card door – it’s a push and slide mechanism, and is also clearly well sealed against the environment. There are two SD card slots, they can be configured to mirror each other, or not, in which case you can choose which card the camera shoots on. 

This is a great feature, much requested by professional shooters where losing shots on the basis of a faulty SD card is too much of a risk.

11

Marmara Beach, early morning Leica SL with Leica Tri Elmar M f4 16-18-21 at 18mm ISO 1000

The Base Plate

This is covered with a thick layer of rubber, however, it doesn’t quite reach the edges. There is a tripod mount in line with the centre of the lens. Like the Leica T the battery becomes part of the base plate and there is a lever for ejecting it. Depending on how you use the camera; battery life is excellent; I’ve managed to get over 700 images on a single charge using the 24-90 zoom. the charger is a reasonable size, and like the M charger it has a normal figure of eight port, so that you can use any old cable or an apple connector of your choice to link it to the power supply wherever you are. I’m really fed up with that box of different  proprietary connectors for different zones!

12

Escape on the Daskiologiannis Leica SL with Leica Vario Elmar R f4 35-70 ISO 50

The Fundamentals

Autofocus

The Leica Q was a hint of what was to come. Leica have really made a quantum leap forward and the AF is extremely quick; right up there with the best of the mirrorless cameras, The SL has Single shot, Continuous (fast and slow), and Interval modes, and you can choose between a selectable focus point (here the joystick really comes into its own) Face Detect  / Closest focus distance and Focus Tracking together with Touch Focus. The options are simple and comprehensive.

I still don’t think that tracking focus on mirrorless cameras has caught up with the phase detect systems on the professional dSLR systems, sadly the SL is not an exception to this rule. On the other hand the point focusing is incredibly fast, and together with the combination of a joystick and multiple focus points I got excellent and predictable results.

You can configure the camera to focus on pressing the joy stick when in MF mode; with a half press of the shutter holding the exposure. If you have the AF on the shutter release then if you half press the shutter you can refine the focus manually with the focus ring on the lens.

Taken all in all, the AF system is easy to configure, easy to understand and works pretty well, the only downside being that the Tracking focus still isn’t as reliable as the best dSLR cameras.

13

Curlicue Leica SL with Leica APO Summicron M f2 50 ISO 50

Manual Focus

I’ve found it a real pleasure using manual focus with a good quality EVF and that with practice it’s perfectly possible to focus accurately without any assistance aids. I’ve written about this with respect to the Leica T  (http://www.slack.co.uk/2014/Leica_T_Manual_Focus.html). Let’s face it, everyone accepts that focusing accurately with a rangefinder requires practice, but somehow they seem to feel that with an EVF it should be second nature. With the improved viewfinder of the SL, manual focus without assistance is even easier.

However, Leica have listened to their customers, and with  focus peaking and moveable zoom magnification the SL has all the focus assistance anyone could require. What’s more they have obviously thought very hard about the implementation of this: I particularly like the zoom focus, which by default is on the bottom left hand button on the back – it’s easy to hit with one’s thumb whilst looking through the viewfinder – one touch zooms in to about 3x, the second touch to about 10x, the third touch zooms out again . . . however, if you do the first touch (to 3x) and then wait a few seconds the second touch zooms you out again rather than further in. You can move the zoomed in point around quickly using the joystick. The review mode works the same way, with the bonus that you can also zoom by tapping / double tapping the LCD.

The Electronic Viewfinder

Everyone loved the viewfinder on the Leica Q, with it’s 3.86 million dot EVF. Here Leica have raised the bar even higher with a 4.4 million dot EVF, but much more impressive is the huge size, which is a class leading 0.8 magnification (the EVF on the Sony A7rii is 2.36 million dots and has 0.78 magnification). To put this into context, it’s roughly the same as the legendary Leica R6.2, and the Nikon D810 is only 0.7x. In my prototype camera I would have liked it to be less contrasty, but this should have changed for the production camera.

Suffice to say the viewfinder is extremely large and great to use.

14

Poppy and Purple Leica SL with Leica Vario Elmar R f4 80-200 ISO 50

Responsiveness and the shutter

With the Q it seemed that Leica had suddenly solved all their speed and responsiveness issues. No more viewfinder blackout, no waiting for files to write to disk. If anything the SL is even faster, the startup speed is really impressive (only slowed down slightly if you have full SD cards). Like the Q, there is no significant viewfinder blackout, and the latency seems to be very slight, even in fairly poor light.

The combination of quick AF and the excellent EVF, the large buffer and the quick shot to shot times makes this camera quite  competitive with one of the professional level dSLR cameras from Canon or Nikon.

Interestingly, and rather against the trend, the SL does not have an electronic shutter like the Leica Q or the Sony A7 cameras. However, useful as the electronic shutter undoubtedly is, it is usually used either for shooting quietly, reducing shutter shock, or else shooting in very bright conditions.

The shutter of the SL is really really quiet – deliciously so, and with the mass of the body, I don’t think that shutter shock could ever be a problem (certainly I’ve found no evidence of it), in terms of stealth, the camera is quiet enough to shoot in any conditions without disturbing the subject.

The Leica SL has a functional base of 50 ISO and a top shutter speed of 1/8000th. to put this into context with respect to the Leica M (200 ISO and 1/4000th) you have 3 extra stops of leeway in bright light. In comparison with the Q you have a one stop advantage. This is all without reverting to the use of an electronic shutter.

It’s worth noting that the actual Sensor base ISO is 100, but Leica claim that there is no discernible fall off in quality at the (theoretically) ‘pulled’ 50 ISO. I’ve tested this thoroughly, and I certainly couldn’t identify any reduction of dynamic range at 50 ISO

The disadvantage of an electronic shutter is the possibility of rolling shutter effects, especially in artificial lighting where there is a likelihood of banding, but also in other situations where there is fast movement. The SL avoids these potential problems but still produces the benefit of almost silent shooting and the ability to shoot in very bright light.

The other real pleasure of the low base ISO and the fast shutter was the ability to use Leica M lenses wide open in bright lighting conditions. In fact, during our recent trip to Crete, I didn’t find any situations where I wanted to use a wide aperture and where the sunshine made the exposure impossible. ND filters relegated to the camera closet!

15

Predator Leica SL with Leica Vario Elmarit f2.8-f4 24-90 ISO 200

Image Quality

If you actually need 40Mp for your work, then clearly the 24mp of the Leica SL is not going to be enough. Personally, I feel that until there is a quantum leap in computer power, then 24mp is just about the sweet spot for a modern digital camera. There is a move in the industry towards larger and larger numbers, and whilst I sympathise in terms of ‘sampling’, I also feel that you can produce as big a print as you like with 24mp (for normal viewing distances).

The sensor in the Leica SL is a sibling of the much praised sensor in the Leica Q, and as you would expect, the image quality is at least equivalent. The colour is great, and the lack of an AA filter provides the maximum detail from the sensor. The high ISO is excellent.

The DNG files are fully supported by the current Apple software (including Aperture, Photos and the OS X core processes), but of course they will be optimised for use in Adobe Lightroom. I’ve mostly been using Lightroom, and I’ve found the files to be excellent, and they allow a lot of post processing before showing signs of falling apart.

The dynamic range seems to be fine; with it being possible to extract seemingly endless detail from the shadow areas. The highlights are not too prone to clipping. Altogether a great performance, and worthy of Leica.

16

DNG Leica SL with Leica Summilux M Asph f1.4 28mm ISO 50

The 24-90 f2.8-f4 Vario Elmar

Three lenses are to be announced at the launch of the camera:

Leica Vario-Elmarit SL 1:2.8-4 / 24-90 Aspherical

Leica Apo-Vario-Elmarit SL 1:2.8-4 / 90-280mm

Leica Summilux SL 1:1.4 / 50mm Aspherical

In Addition there will be two new TL mount (T mount APSc) lenses announced (to be available later)

Leica Summilux Asph 35mm f1.4 (equivalent 50mm in full frame)

Leica Elmarit 60mm macro (equivalent to 90mm in full frame).

This is a really interesting and welcome development – not so much with relationship to the SL (although they’ll be fast AF lenses when one doesn’t need full resolution) but more because it shows Leica’s obvious continuous commitment to the development of the Leica T. I still love that little camera!

Only the 24-90 will be ship with the camera, and this is the only lens I’ve had the opportunity to test. The trio seems to me to be a sensible starting point for a new system, with a full zoom range from 24-280 and a high quality fast prime lens. I’m sure it’s just the beginning of a much larger system, and in the meantime there is a wealth of M, R, T and S lenses which can be used with the camera – indeed, it’s perfectly possible to use the camera with any lens for which there is an existing M adapter by the simple device of stacking a T to M adapter with the relevant adapter for the lens (for example the Contax T* lenses). There will also be an adapter for the Leica S lenses providing full auto-focus functionality.

The 24-90 Vario-Elmarit is a large lens, as big as you would expect a fast, high quality zoom for any dSLR system and slightly larger than the Leica R 24-90 Vario Elmarit. It would seem that these lenses don’t come small (witness Sony’s inability to produce small zooms for the A7 cameras).  Perhaps this explains why Leica haven’t tried to make the SL smaller, as very small bodies don’t really play well with larger lenses.

As far as quality is concerned, Leica feel that this lens is the best zoom lens they’ve ever produced, the only compromise has been the variable aperture (f2.8-f4) which allows them to maximise the image quality. Certainly, from my experience it’s a really fantastic lens at all apertures and all focal lengths.

17

Cam’s Children Leica SL with Leica Vario Elmarit f2.8-f4 24-90 ISO 50

Other Features

GPS

It’s a great feature, but It’s only really useful if it works properly. The GPS on the SL does seem to be both extremely accurate and very fast. Even when switching on and taking an image immediately it seems to get it right most of the time.  I’ll talk about this more in field reports later.
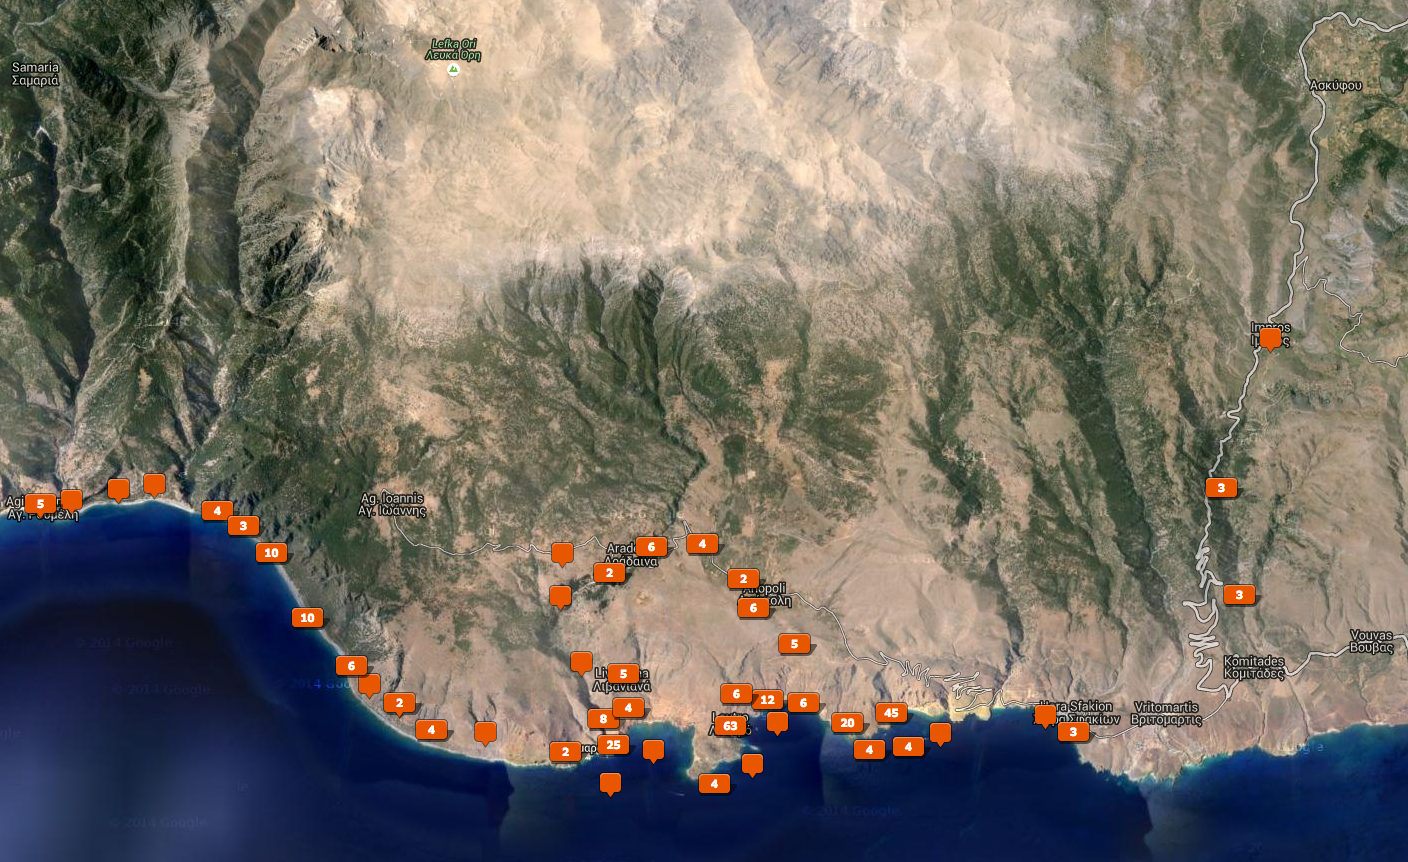
18

Crete Map

Wifi Connectivity

I’m hoping that this will also work well, but I’ve not had an opportunity to test this as the App for IOS was not yet ready.

Video

I understand that the video features are very impressive, but I’m no expert in the field, so I’ll leave that up to others to report on

19

From Agios Pavlos to Agia Roumelli Leica SL with Leica Tri Elmar M f4 16-18-21 at 18mm ISO 50

The Leica SL with Leica T lenses

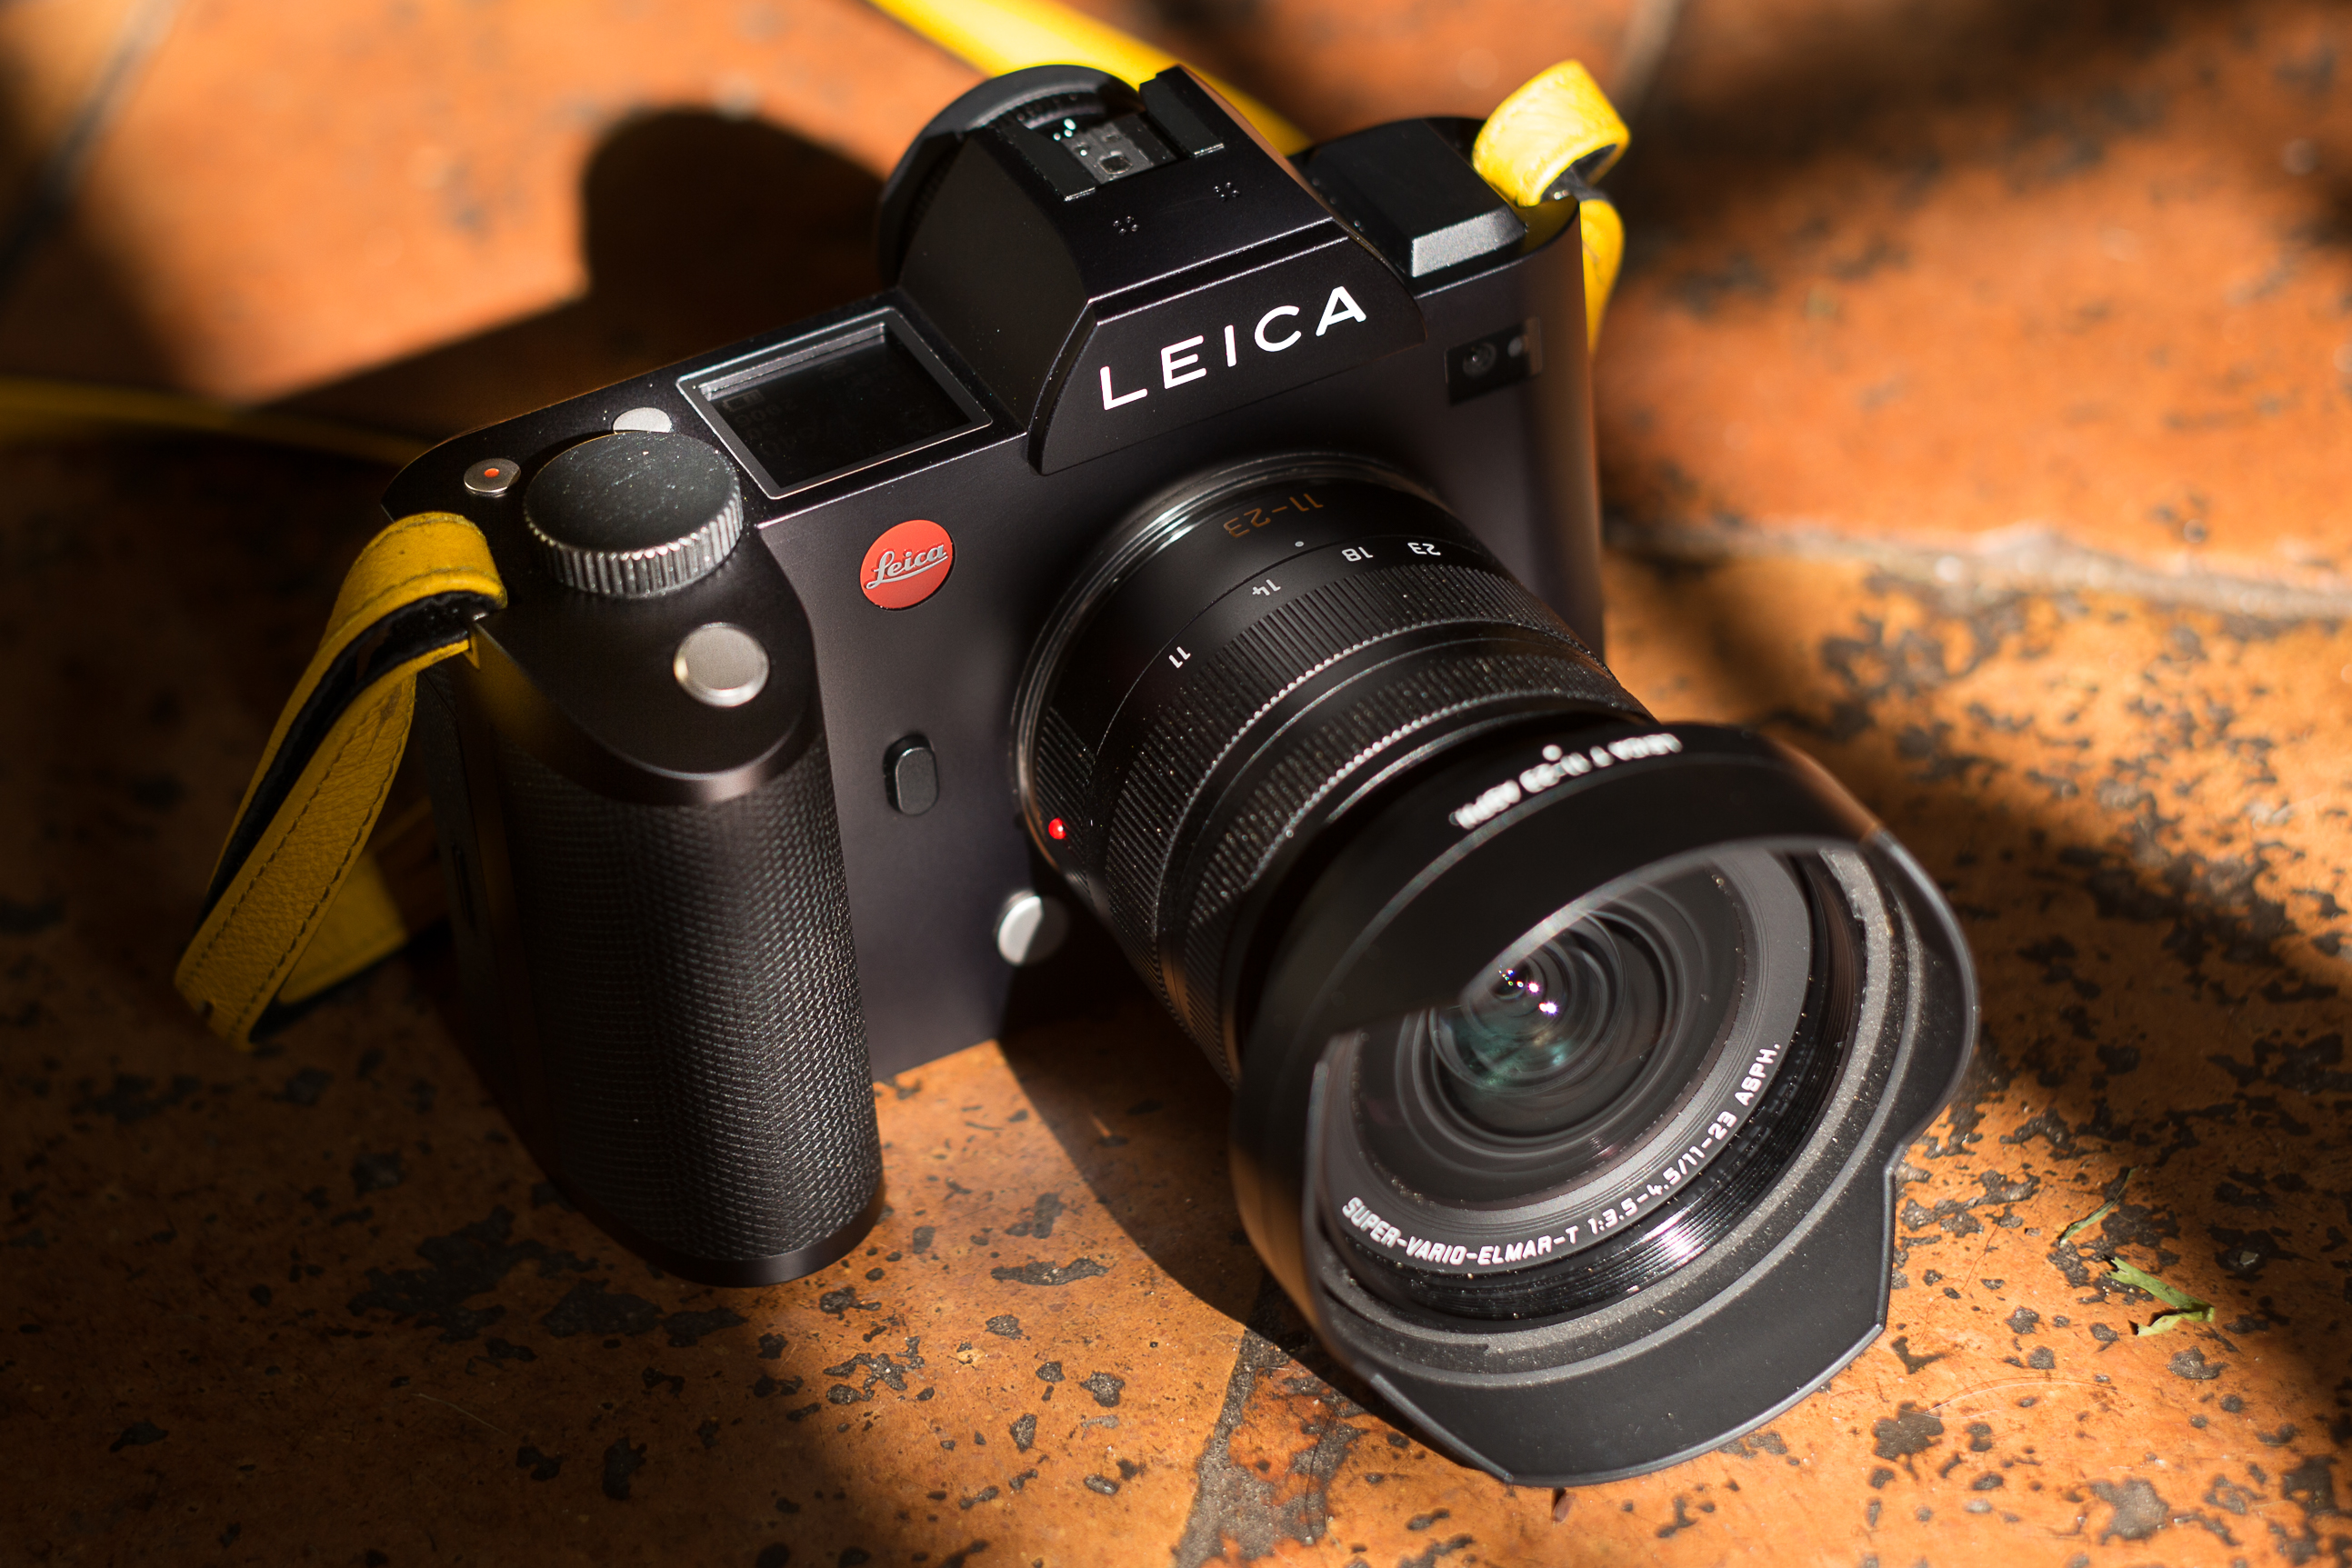
The SL has a crop mode for use with the existing Leica T lenses. This produces images of around 10.3Mp – not as much as the Leica T, but covering the same APSc area of the sensor (the pixels in the SL are larger than those in the T). There are lots of circumstances where this is sufficient, and of course it provides the possibility of 3 high quality and extremely compact zoom lenses:

Leica Super-Vario-Elmar-T 11-23mm f/3.5-4.5 ASPH (17-35 equivalent)

Leica VARIO-ELMAR-T 18-56mm f3.5-5.6 ASPH (28-85 equivalent)

Leica APO-Vario-Elmar-T 55-135mm f/3.5-4.5 ASPH (80-200 equivalent)

and a fast prime: Leica T Summicron-T 23mm f2 ASPH (35 equivalent)

Also announced are the new 35 Summilux (50 equivalent) and 60mm macro (90mm equivalent)

The good news is that the AutoFocus speed with these lenses is much, much faster than it is with the Leica T (really in another league, and up with the AF of the Leica Q and competitive mirrorless systems). This isn’t just good for the SL, it also means that these lenses are capable of much faster AF with any future T cameras.

I have used the SL with all of these lenses, and they all produce excellent results with fast AF.

The Leica SL with Leica S lenses

The ability to use Leica S lenses with the Leica SL is really important with respect to it’s reception as a complete camera system.

Unfortunately the adapter wasn’t available for me to test (and anyway I don’t personally own any S lenses). I understand that the adapter will support AF for the S lenses. Although they are expensive and rather large, using them on a full frame sensor should make the most of the sweet spot of the lenses, and the image quality really should be incredible.

Of course, the S lenses will behave on full frame at their actual focal length, so that the 70mm summarit will behave as a 70mm lens (whereas it behaves as a 50mm on the Leica S). I must say I’d really like to try the Leica Apo-Macro-Summarit-S 120mm f2.5 on the SL body. I can’t imagine that it’s possible to get better image quality in a macro lens.

20

In the Aradhena Gorge Leica SL with Leica Summilux M Asph f1.4 35mm (FLE) ISO 50

The Leica SL with Leica R lenses

There will be a Leica T to R adapter in the near future. However, it was not ready in time for me to test, so I’ve been using R lenses with the Leica T to M adapter and the Leica M to R adapter stacked.

This works remarkably well – I have changed the bottom right button on the rear panel to bring up Lens Profiles. With the stacked adapters, the camera recognises the 6 bit coding on the M to R adapter and brings up a list of R lenses to choose from. Better than this, it remembers the last R lens used, so if you are regularly using the same R lens it will set the profile automatically.

Of course, this has a number of advantages over using R lenses on dSLR or other mirrorless cameras. First of all the fact that the exif information is filled in automatically, but more importantly it means that the focal length of the lens is registered and can be used in the Auto ISO settings to set the maximum exposure time tot 1x or 2x the focal length.

I have spent the last month with the Leica SL without the 24-90 zoom, and so I’ve been shooting exclusively with M, T and R lenses. Specifically the 35-70 f4/macro, the 80-200 f4 and the 60mm f2.8 macro elmarit. Of course, these lenses don’t require any introduction to R users, and they don’t represent the very best available lenses (my wallet doesn’t stretch that far). However, I’ve found them all to be really usable, producing excellent results.

With the large bright EVF of the SL, manual focusing is really easy. Best results are achieved by focusing wide open and stopping down, but this is not nearly as critical as it is on a dSLR camera as the light in the viewfinder gains whilst the aperture reduces. Certainly, I’ve been get a really good focus hit rate even when stopped down to f8.

When the Leica R10 project was abandoned, Leica promised to provide a proper replacement for R lenses, the Leica SL clearly is that replacement, whether intentionally or not. The bottom line is that there is not a better alternative for R lenses than the Leica SL.

21

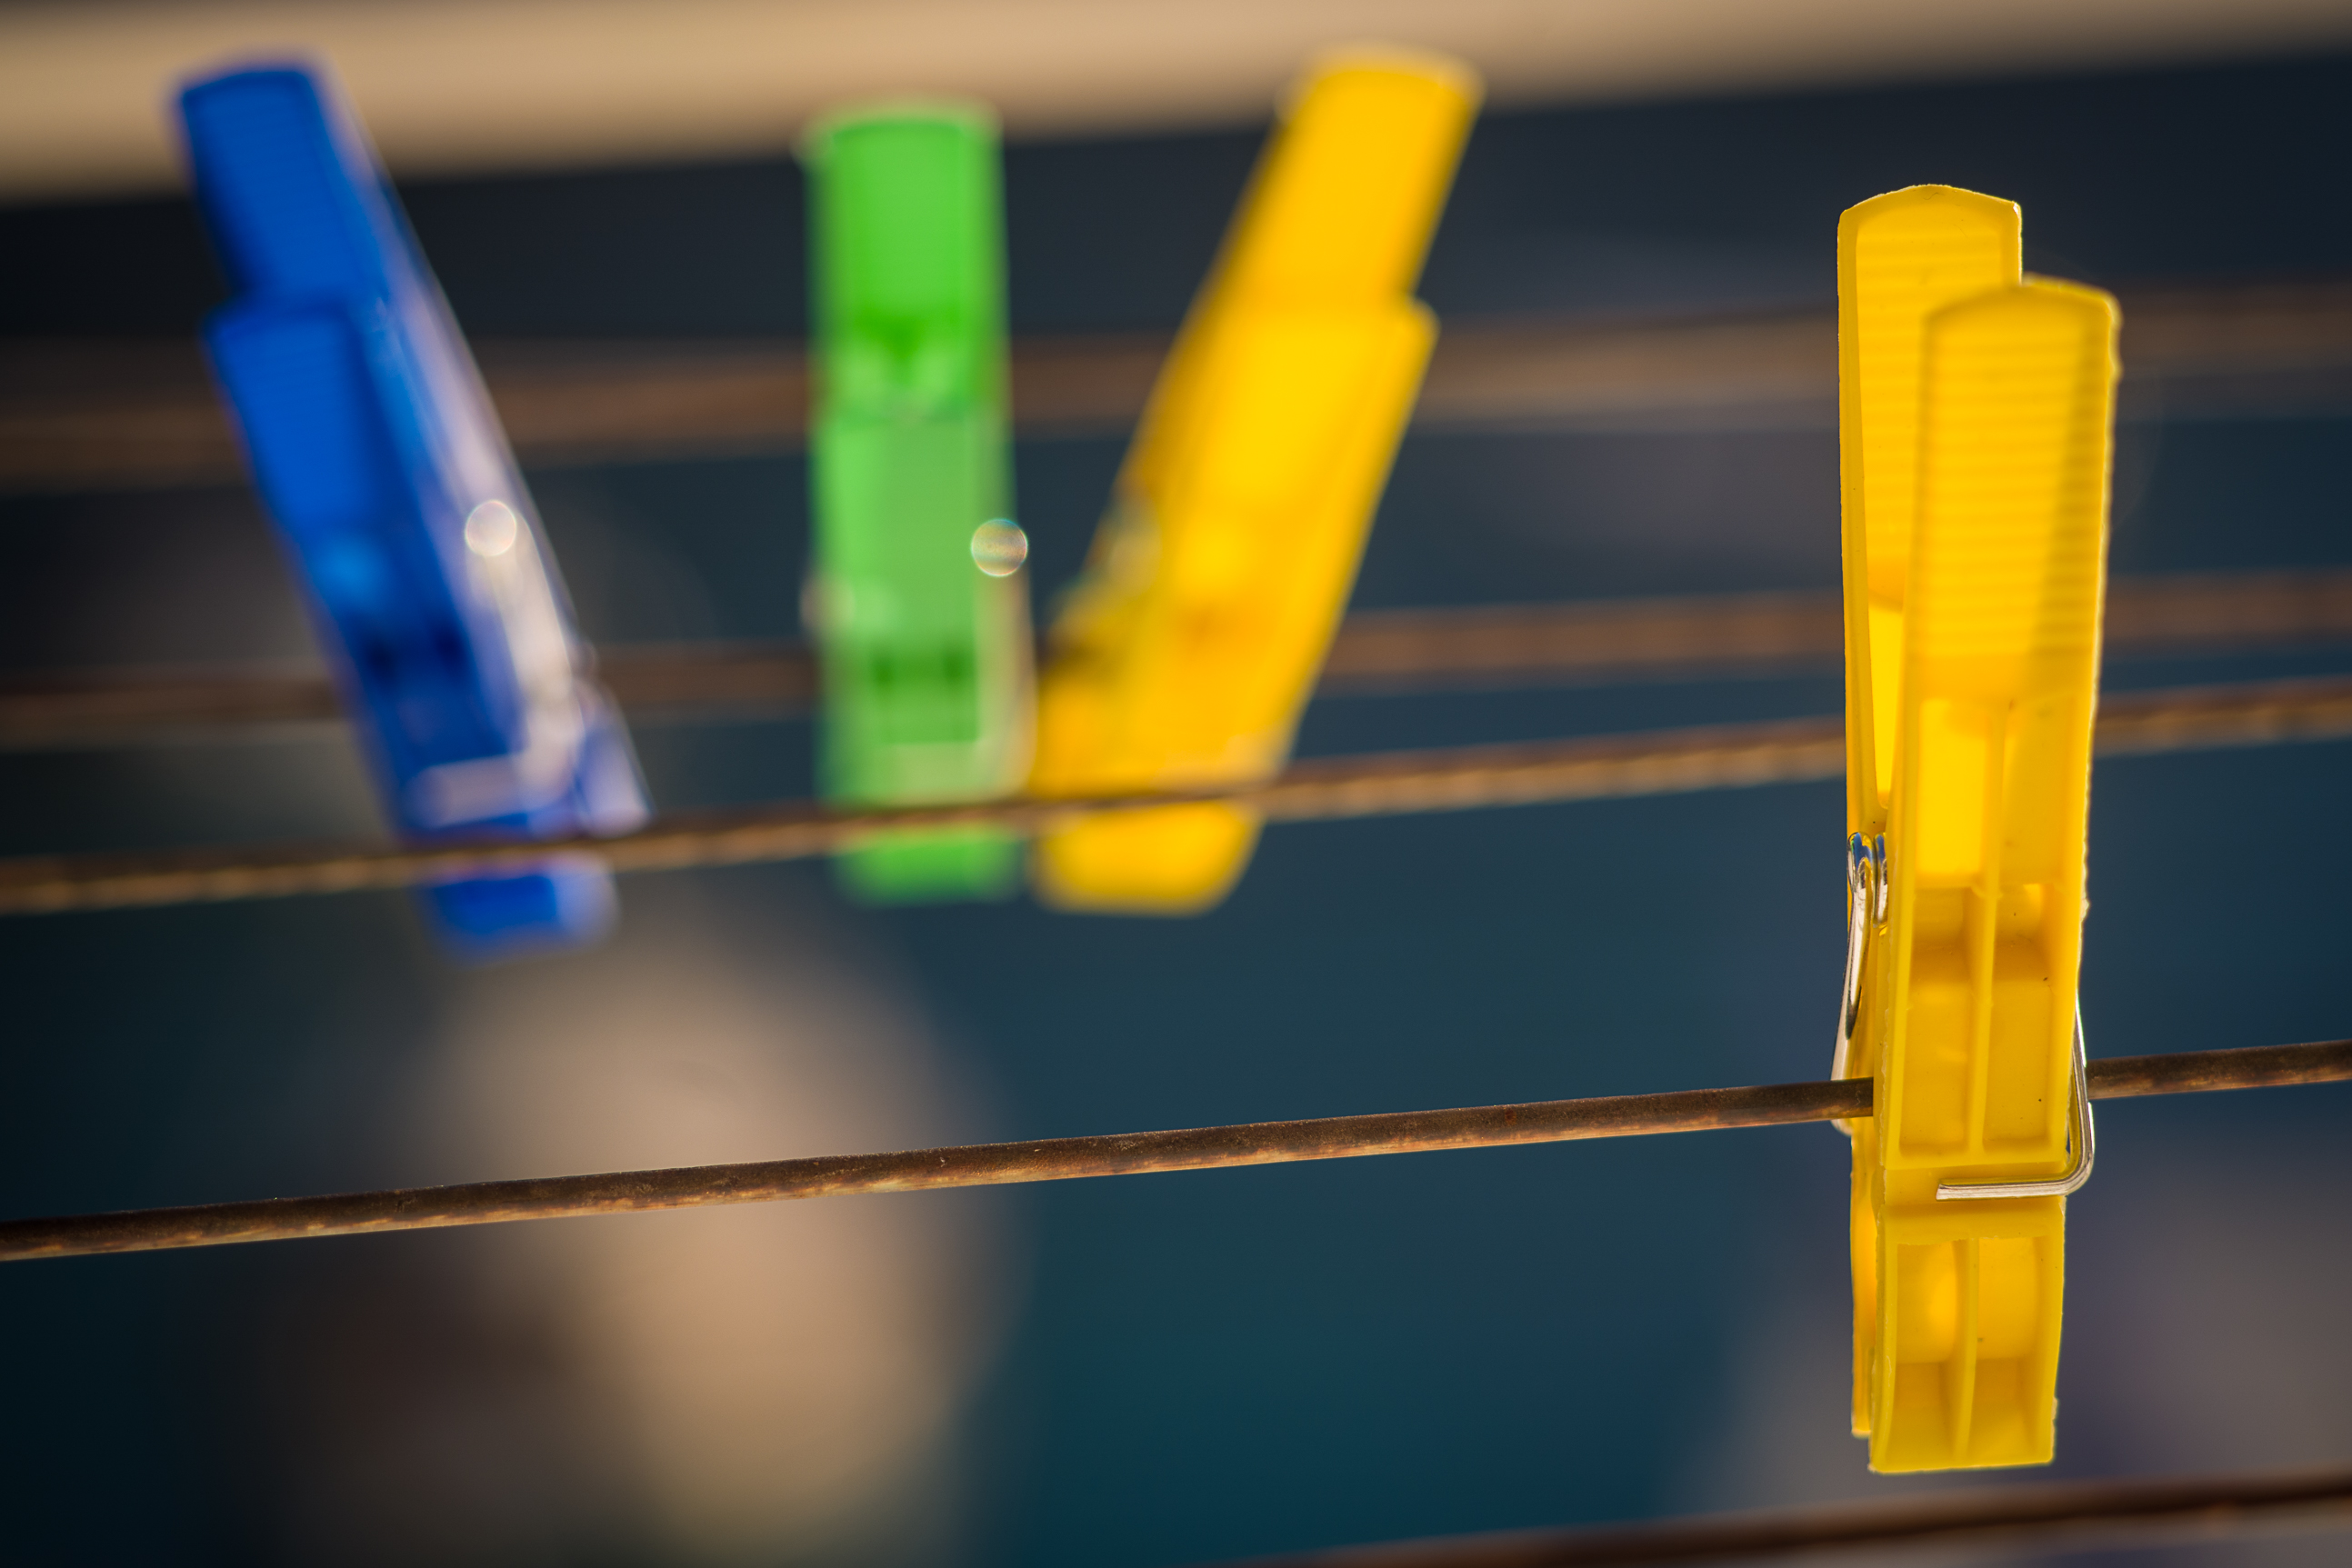
BGY (blue green and yellow) Leica SL with Leica Vario Elmar Rf4 35-70 ISO 50

The Leica SL with Leica M lenses

For many photographers using Leica M lenses on a mirrorless camera with an EVF is the holy grail.

Currently the only full frame competitor for the Leica SL is the Sony A7 range of cameras. Whilst these are undoubtedly excellent cameras and they do well with longer focal length M lenses; especially at close to medium distances. Problems do start to occur at longer distances (when the rear element is closer to the sensor)  and at shorter focal lengths (where the angle of incidence of light on the sensor is more acute). This causes fairly intense ‘smearing’ at the edges and corner of the frame, worse at wider apertures and wider focal lengths, but in actual fact, the smearing is still  visible in the corners at f8 on the 50mm Summilux Asph. This isn’t really a criticism of Sony – why should they design their sensors to work well with rangefinder lenses (which they don’t themselves produce)?

Ron Scheffler has done a series of excellent and diligent comparisons between the Sony cameras and the Leica M cameras in his Tech Talk sub site (http://www.ronscheffler.com/techtalk/). The general consensus seems to be the this smearing is a function of the thickness of the coverglass over the sensor, the thicker the coverglass, the more the problem.

For me then, the $64,000 dollar question was whether the Leica SL would perform well enough with Leica M lenses. To that end I dusted down my tripod and headed to the Suffolk coast with my Leica M240, the Leica SL, and my son Silas’s Sony A7 mark 2, together with a selection of Leica lenses which have proved problematic. I took a leaf out of Sean Reid’s book, and did this properly, shooting at f2.8, f4, f5.6 and f8 with each lens, with focus bracketing for each set. I am intending to post the original files and the comparison between the Sony A7 mark 2 and the Leica SL in a later article, but suffice to say, that although the edges and corners of the M240 were slightly better than the SL, the results for the SL were hugely better than those from the Sony A7 mark 2. Sadly, I didn’t have a Sony A7r mark 2, but the cover glass is the same thickness as that on the A7, and there is no reason to suppose that the results will be any better than the A7 mark 2.

I will be doing a separate article on the comparisons, Sean Reid has been doing detailed comparisons between M lenses on the SL and on the Leica M240, together with thorough testing of Leica R lenses on the Leica SL and several Field Reports. You can read his reports at www.reidreviews.com.

22

Nearly suppertime Leica SL with Leica Summilux M Asph f1.4 28mm ISO 50

The Leica SL with the T to M adapter reads the 6 bit code automatically and inserts it into the exif, and uses the focal length for automatic ISO calculations. If the lens is uncoded, then you can use the lens profile menu to pick the correct M lens.

Just like the Leica M cameras the SL has in camera profiles for all the modern M lenses so as to correct vignetting and colour cast, these are still being perfected for the final production firmware, but they worked really well for all the lenses I tested. I saw no colour casts, and what vignetting there was caused me no problems – I suspect that Leica have avoided being heavy-handed with this to preserve as much resolution as possible.

I have shot more images with M lenses than with R and T lenses and the 24-90 zoom put together. Favourite lenses have been the Wide Angle Tri Elmar, the 28mm f1.4 Summilux, the 50mm f1.4 Summilux Asph, the 75 APO summicron and the 90mm macro elmar (especially with the Leica Macro Adapter M).  Results have been excellent, and compare well with those from My Leica M240.

Whilst with the 24-90 the Leica SL definitely feels like a large camera (perhaps reminiscent of a Nikon D700); with M lenses it feels small and very very solid. The beautifully dampened shutter and the hand grip make it possible to carry one handed all day (and I’ve done this on many occasions). It also feels really great with the larger M lenses, it felt like a perfect match for the 28mm f1.4 summilux, and I guess it would also be wonderful with the Noctilux (sadly I sold mine).

I still think the perfect camera for an M lens is an M camera, but then I’m in love with the rangefinder experience. The SL certainly makes a lovely partner for M lenses.

23

Sweetwater beach myopia Leica SL with Leica Summilux M Asph f1.4 35mm (FLE) ISO 50

The Leica SL in the Field

Rain and Pink Tractors in the UK

Every year in Suffolk there is a vintage tractor road run for ladies. This is a charity event in aid of Breast Cancer Research, it’s been running for 12 years, and next year they look like passing the £500,000 mark. This year there were around 160 tractors, all decorated in pink, some of the tractors are well over 60 years old.

For the last 4 years I’ve been the official photographer for the event. It’s an interesting challenge, the intention being to catch good images of each of the drivers (and their tractors) at 4 different locations. It takes around 25 minutes for them to pass at each point, they’re travelling quite fast, and sometimes very close together. Any AF system is likely to focus on the front of the tractor rather than the driver, and the english weather usually means that a pretty wide aperture is required. Missing someone is just not an option, and generally speaking you only have a few seconds to focus and shoot each shot, the issue is complicated by the need to get the driver’s attention at the moment you shoot – of course, this means shooting one handed, waving to the drivers with the left hand whilst shooting with he right.

This year it was raining for the first two locations…… not just raining a bit, but pouring down – I didn’t have an assistant, so there was no way of using an umbrella, and there was no cover at any of the shooting locations . . . . . so the SL and the 24-90 just had to get wet, and they did, really seriously wet. But they performed perfectly, no glitches, and the battery was still 1/4 full after 700 shots. I was also pretty wet . . but for the first time since shooting the event I didn’t miss a shot.

24

Leica SL in the rain

25

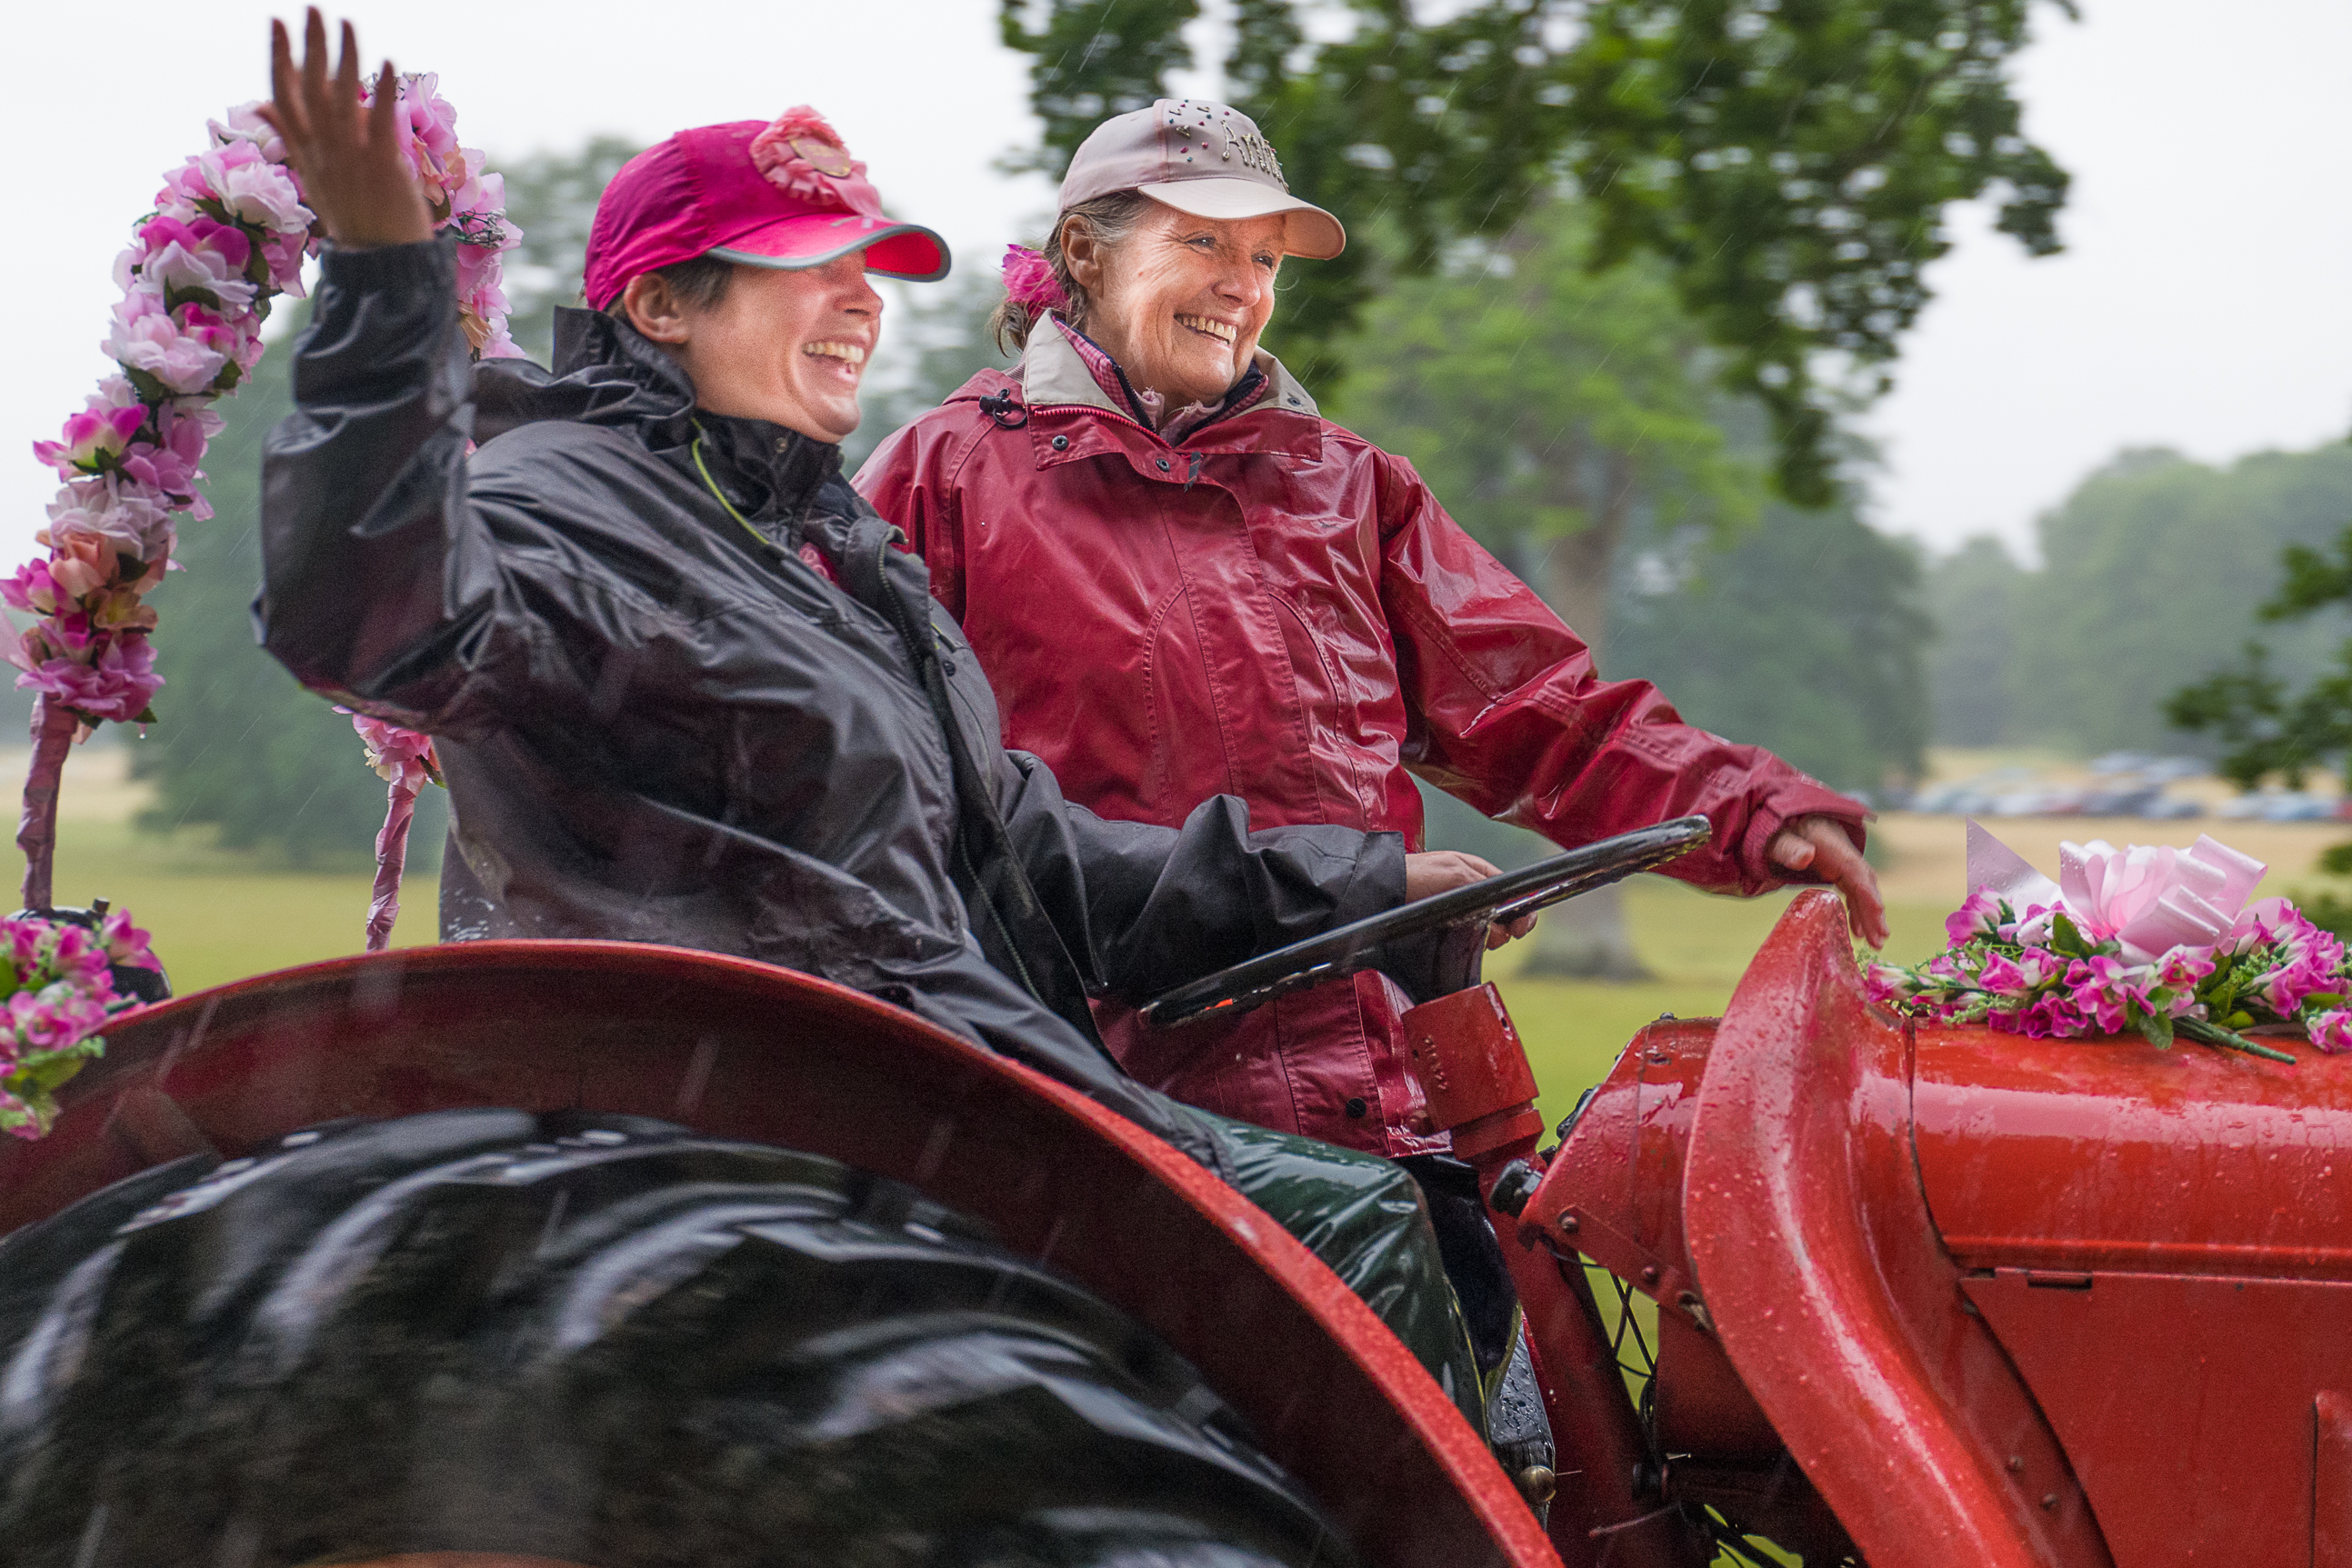
Annie Chapman with Libby Searle on the Pink Ladies tractor run Leica SL with Leica Vario Elmarit f2.8-f4 24-90 ISO 800

Late evening wedding party

In July, just before I was due to return the first prototype, we were asked to a wedding party. The designated photographer left early, so I took over and took images of the party and participants. It was late in the evening, and most of the action was out in the garden – lit only by burning tapers and fireworks; it was very dark! I hadn’t brought the 24-90 with me, and so I made do with the 75 APO summicron and the 50 APO summicron. ISO was mostly between 1600 and 6400 and mostly wide open.

I found focusing to be fine, even in those lighting conditions – there was no time to zoom focus, so it was mostly just at the chosen aperture and focus peaking, but the results were good and the bride and groom were very pleased.

Whilst I’m not certain that the tracking focus is yet good enough to recommend the SL as a sports camera, I’m quite certain that with the 24-90 zoom and a couple of M lenses it would make an excellent and professional solution for a wedding photographer.

26

Love and Star gazing Leica SL with Leica APO Summicron M Asph f2 50mm ISO 1600

Heat and Dust in South West Crete

My wife and I recharge our batteries and get some late summer sunshine in South West Crete each year. Where we go the White mountains come right down to the Libyan Sea, most of the villages have no roads, so you either have to catch a boat or get there on foot.

We do lots of walking, and take lots of photographs. This year it was extremely hot (high 30s Centigrade), and it’s always very dusty. I like to keep a camera in my hand at all times (it’s just not the same if you have to pull it out of a backpack). This meant that the SL was regularly splashed by seawater, drenched in sweat and then liberally dusted – as usual a couple of my lenses will need to have their paint renewed in Wetzlar.

Once again the Leica SL proved to be a tough and rewarding companion. There were several points where my iPhone refused to work (with a message saying it needed to cool down first) – the camera on the other hand performed flawlessly, the only necessary maintenance was to rinse some salty water out of one of the rear buttons which was beginning to get sticky.

27

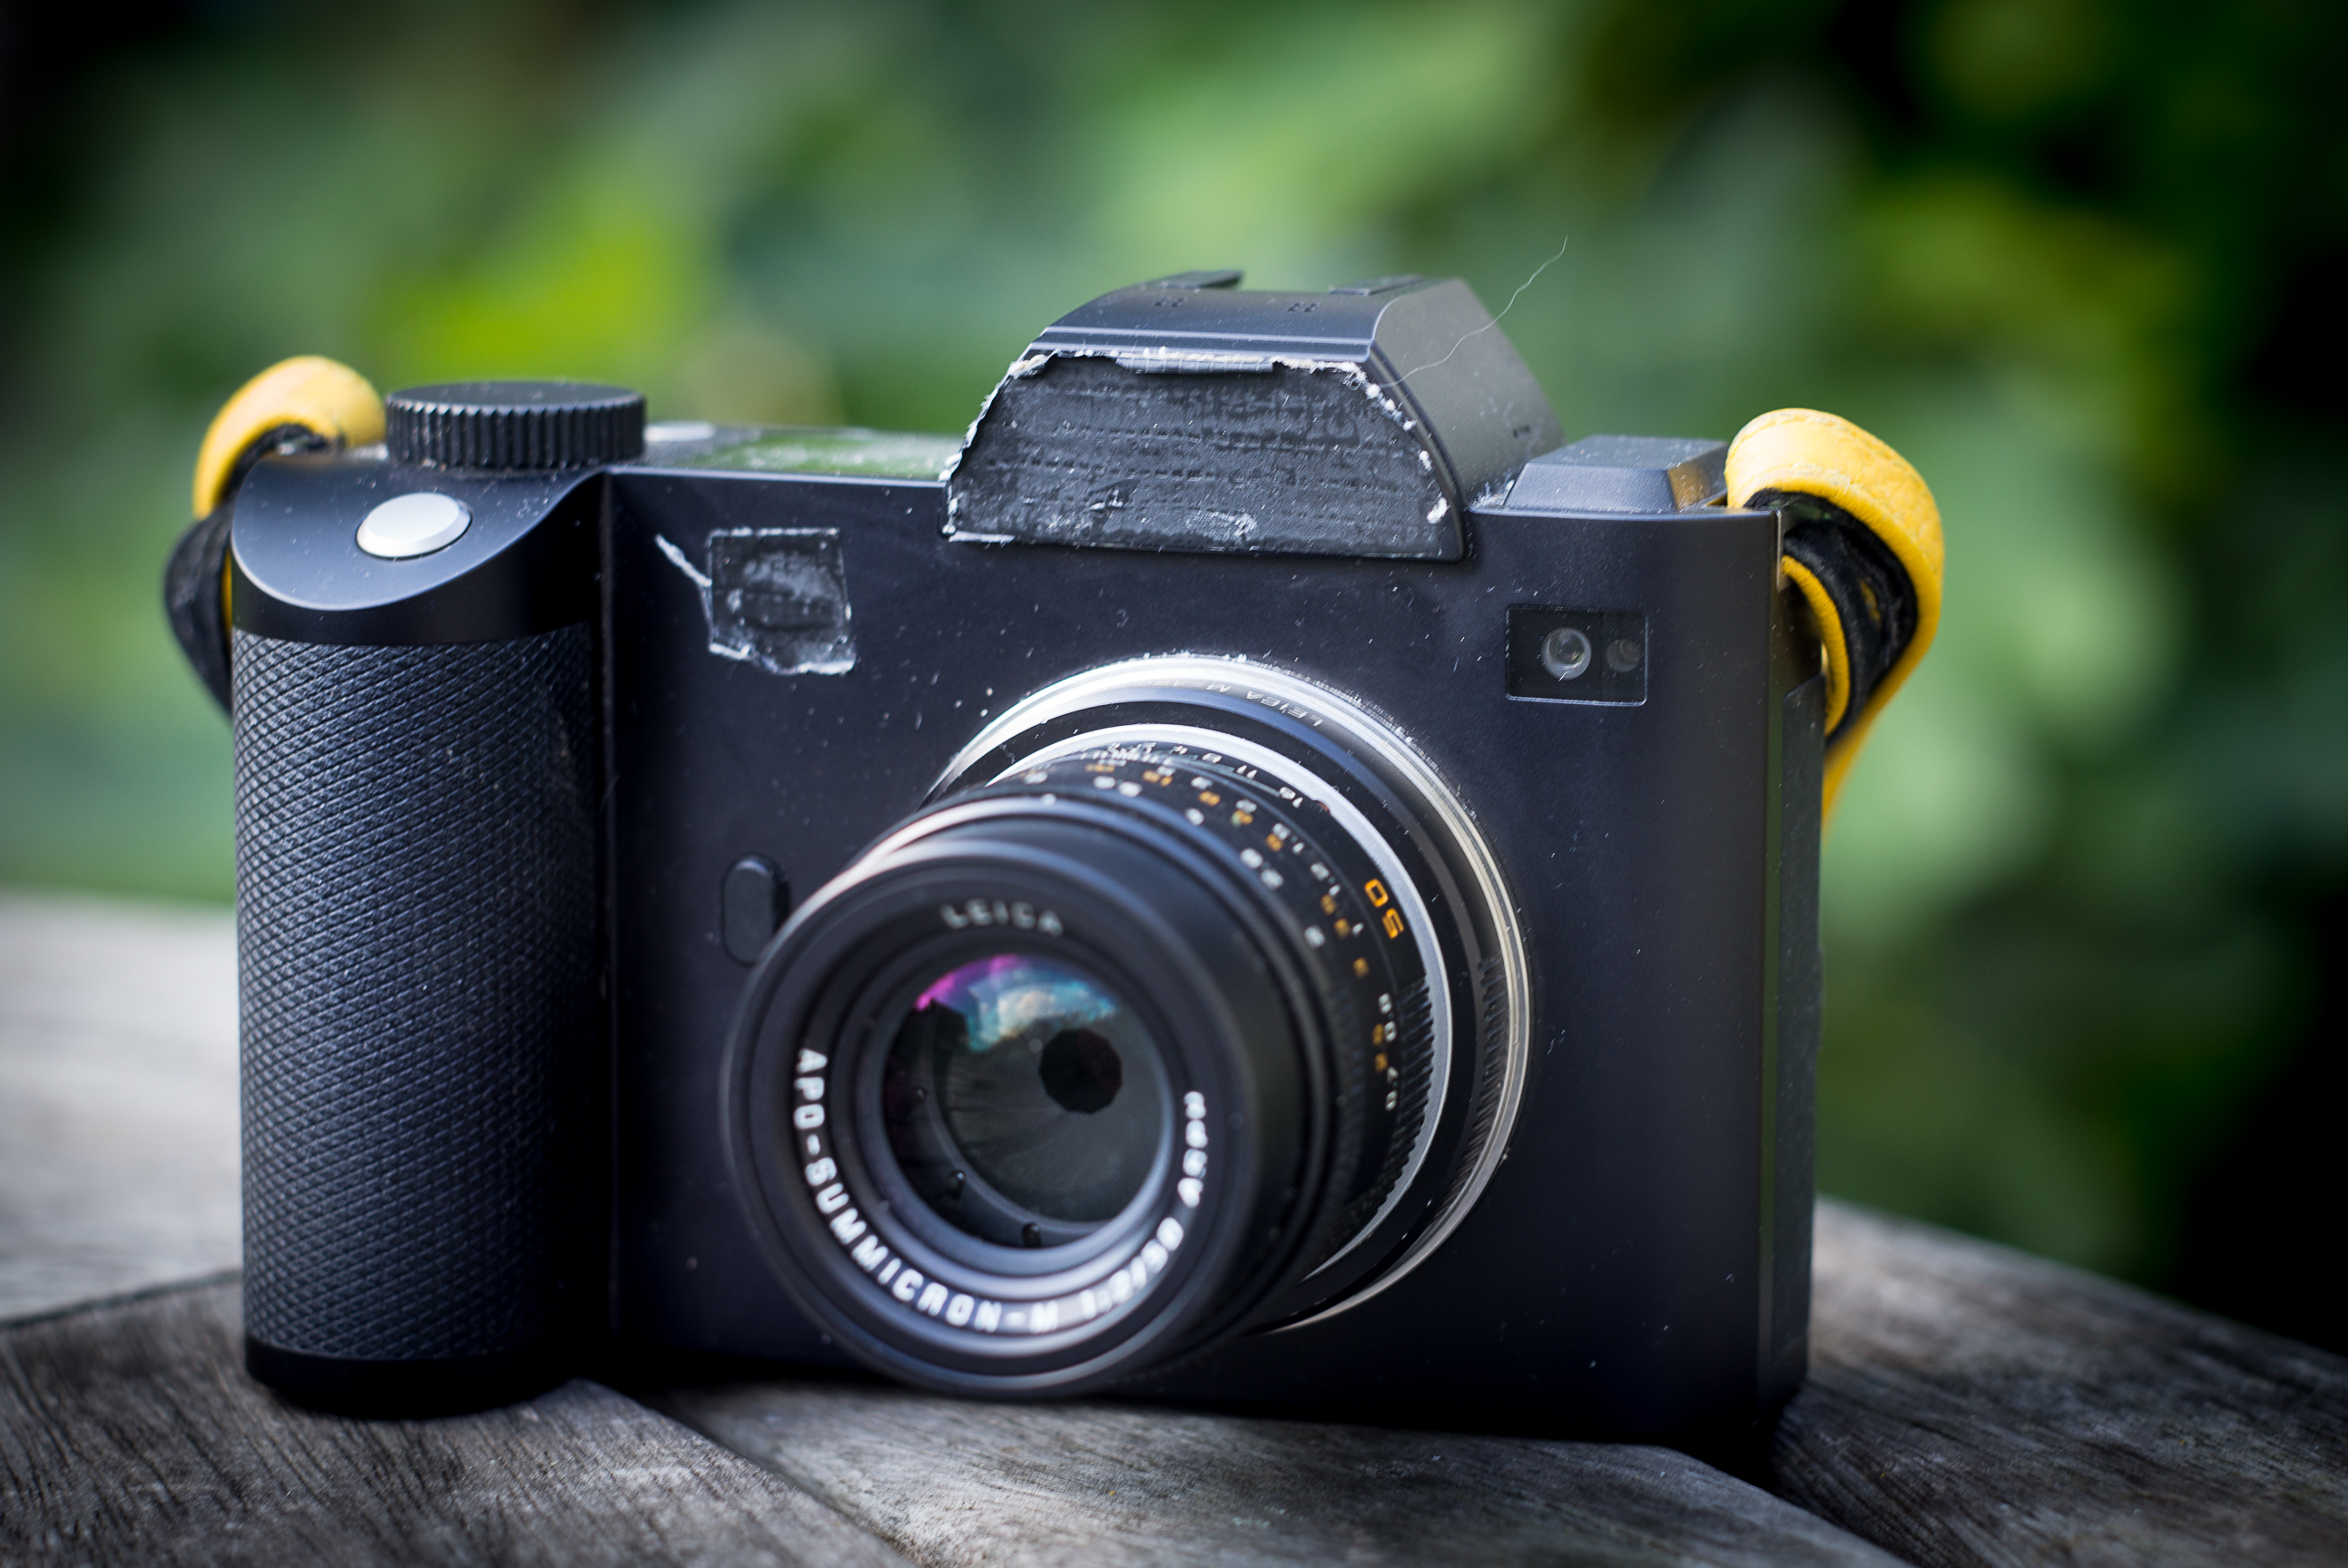
The Leica SL after 3 weeks in Crete (it cleaned up very nicely!

Conclusion

I think that this camera is set to surprise a lot of people, especially those who were anticipating a Leica Q with interchangeable lenses. The truth is that Leica have decided not to produce a direct competitor to the Sony A7, but to build the first really substantial mirrorless camera. The SL has many features normally restricted to the top tier of professional cameras (dual card slots, rigorous weather sealing etc.). It looks and feels like a camera which will survive a real beating – and I’ve done my best to give it as much of a beating as two months allows!

28

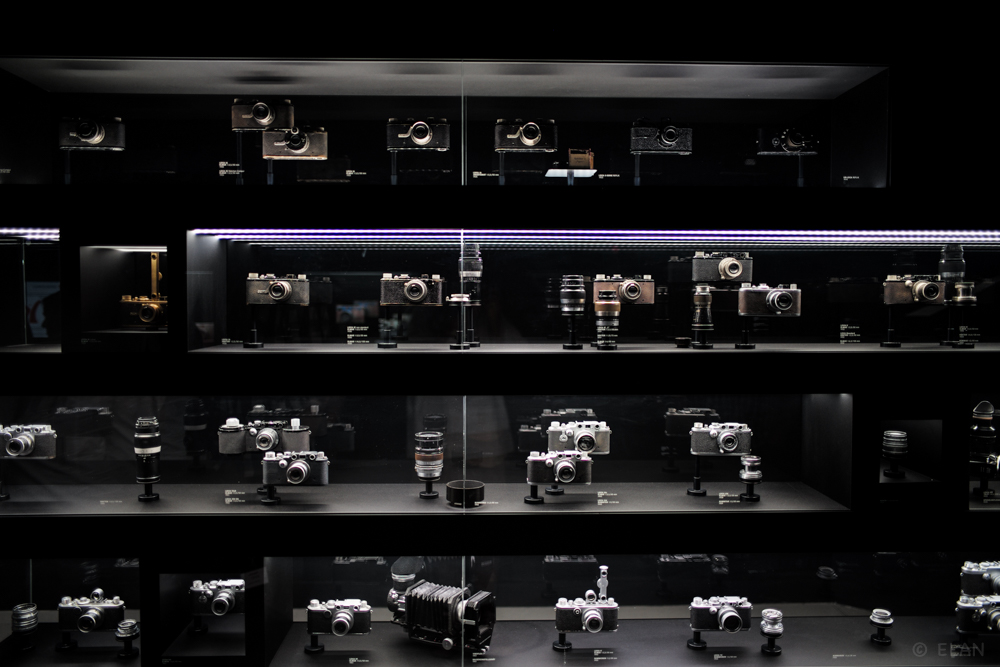
Cameras at dawn (with Emma) Leica SL with Leica Tri Elmar M f4 16-18-21 at 18mm ISO 50

There have been some blurry internet photographs which suggest the body of the SL, but they really don’t do it justice. I think the design team have done a fantastic job with the camera, it feels incredibly well thought out, with all the photographic features that a serious photographer could need, but still keeping to the essentials.

A camera and one lens does not make a system, and it would be naive to think that professional photographers are going to ditch extensive Canon/Nikon/Sony kits to buy into the Leica SL system. But in another sense, if you can manage manual focus, the SL really IS a system, with the huge numbers of M and R lenses properly supported with vignetting and colour cast correction as required. Better than that, If you are already an S user, or if you are willing to buy one or two S primes to go with the Leica SL, they should provide image quality second to none in a full frame camera. It remains to be seen how good the AF is, but the S (typ 007) has proved to me that good autofocus is possible with these lenses.

I would really have liked to have seen in body image stabilisation, but having shot with M and R lenses I’ve found that the size and heft of the body, together with the lovely silky shutter release means that shooting handheld at low shutter speeds is quite easy.

29

Laundry Music Leica SL with Leica 90mm macro Elmar f4 and the Macro Adapter M ISO 100

There are many thousands of R lenses in regular use (you only have to look at the secondhand prices of some of these lenses to realise how much in demand they are). These days most of the lenses are being used on Canon, Sony and Nikon systems with adapters. The Leica SL really does present a better way to use R lenses, and I can imagine a lot of professionals and experienced amateurs who use R lenses buying an SL body to maximise the potential of their lenses. From that point it’s only a small step to buying a native lens or two, and once tried, the quality of the SL camera and it’s lens is quite addictive.

Personally I just love shooting with it. The rather off-beat looks mellow very quickly, and the camera is, frankly, a delight to use: Responsive and always ready, fully featured, but seemingly with nothing unnecessary. Great image quality and wonderful performance with vintage Leica lenses.

Of course, I have no idea whether the SL will be a success; it’s a bold move from Leica, and it’s giving the rest of the camera industry notice that they plan to be a significant part of the marketplace. What I do know is that I’ll be buying one of the first cameras available.

30

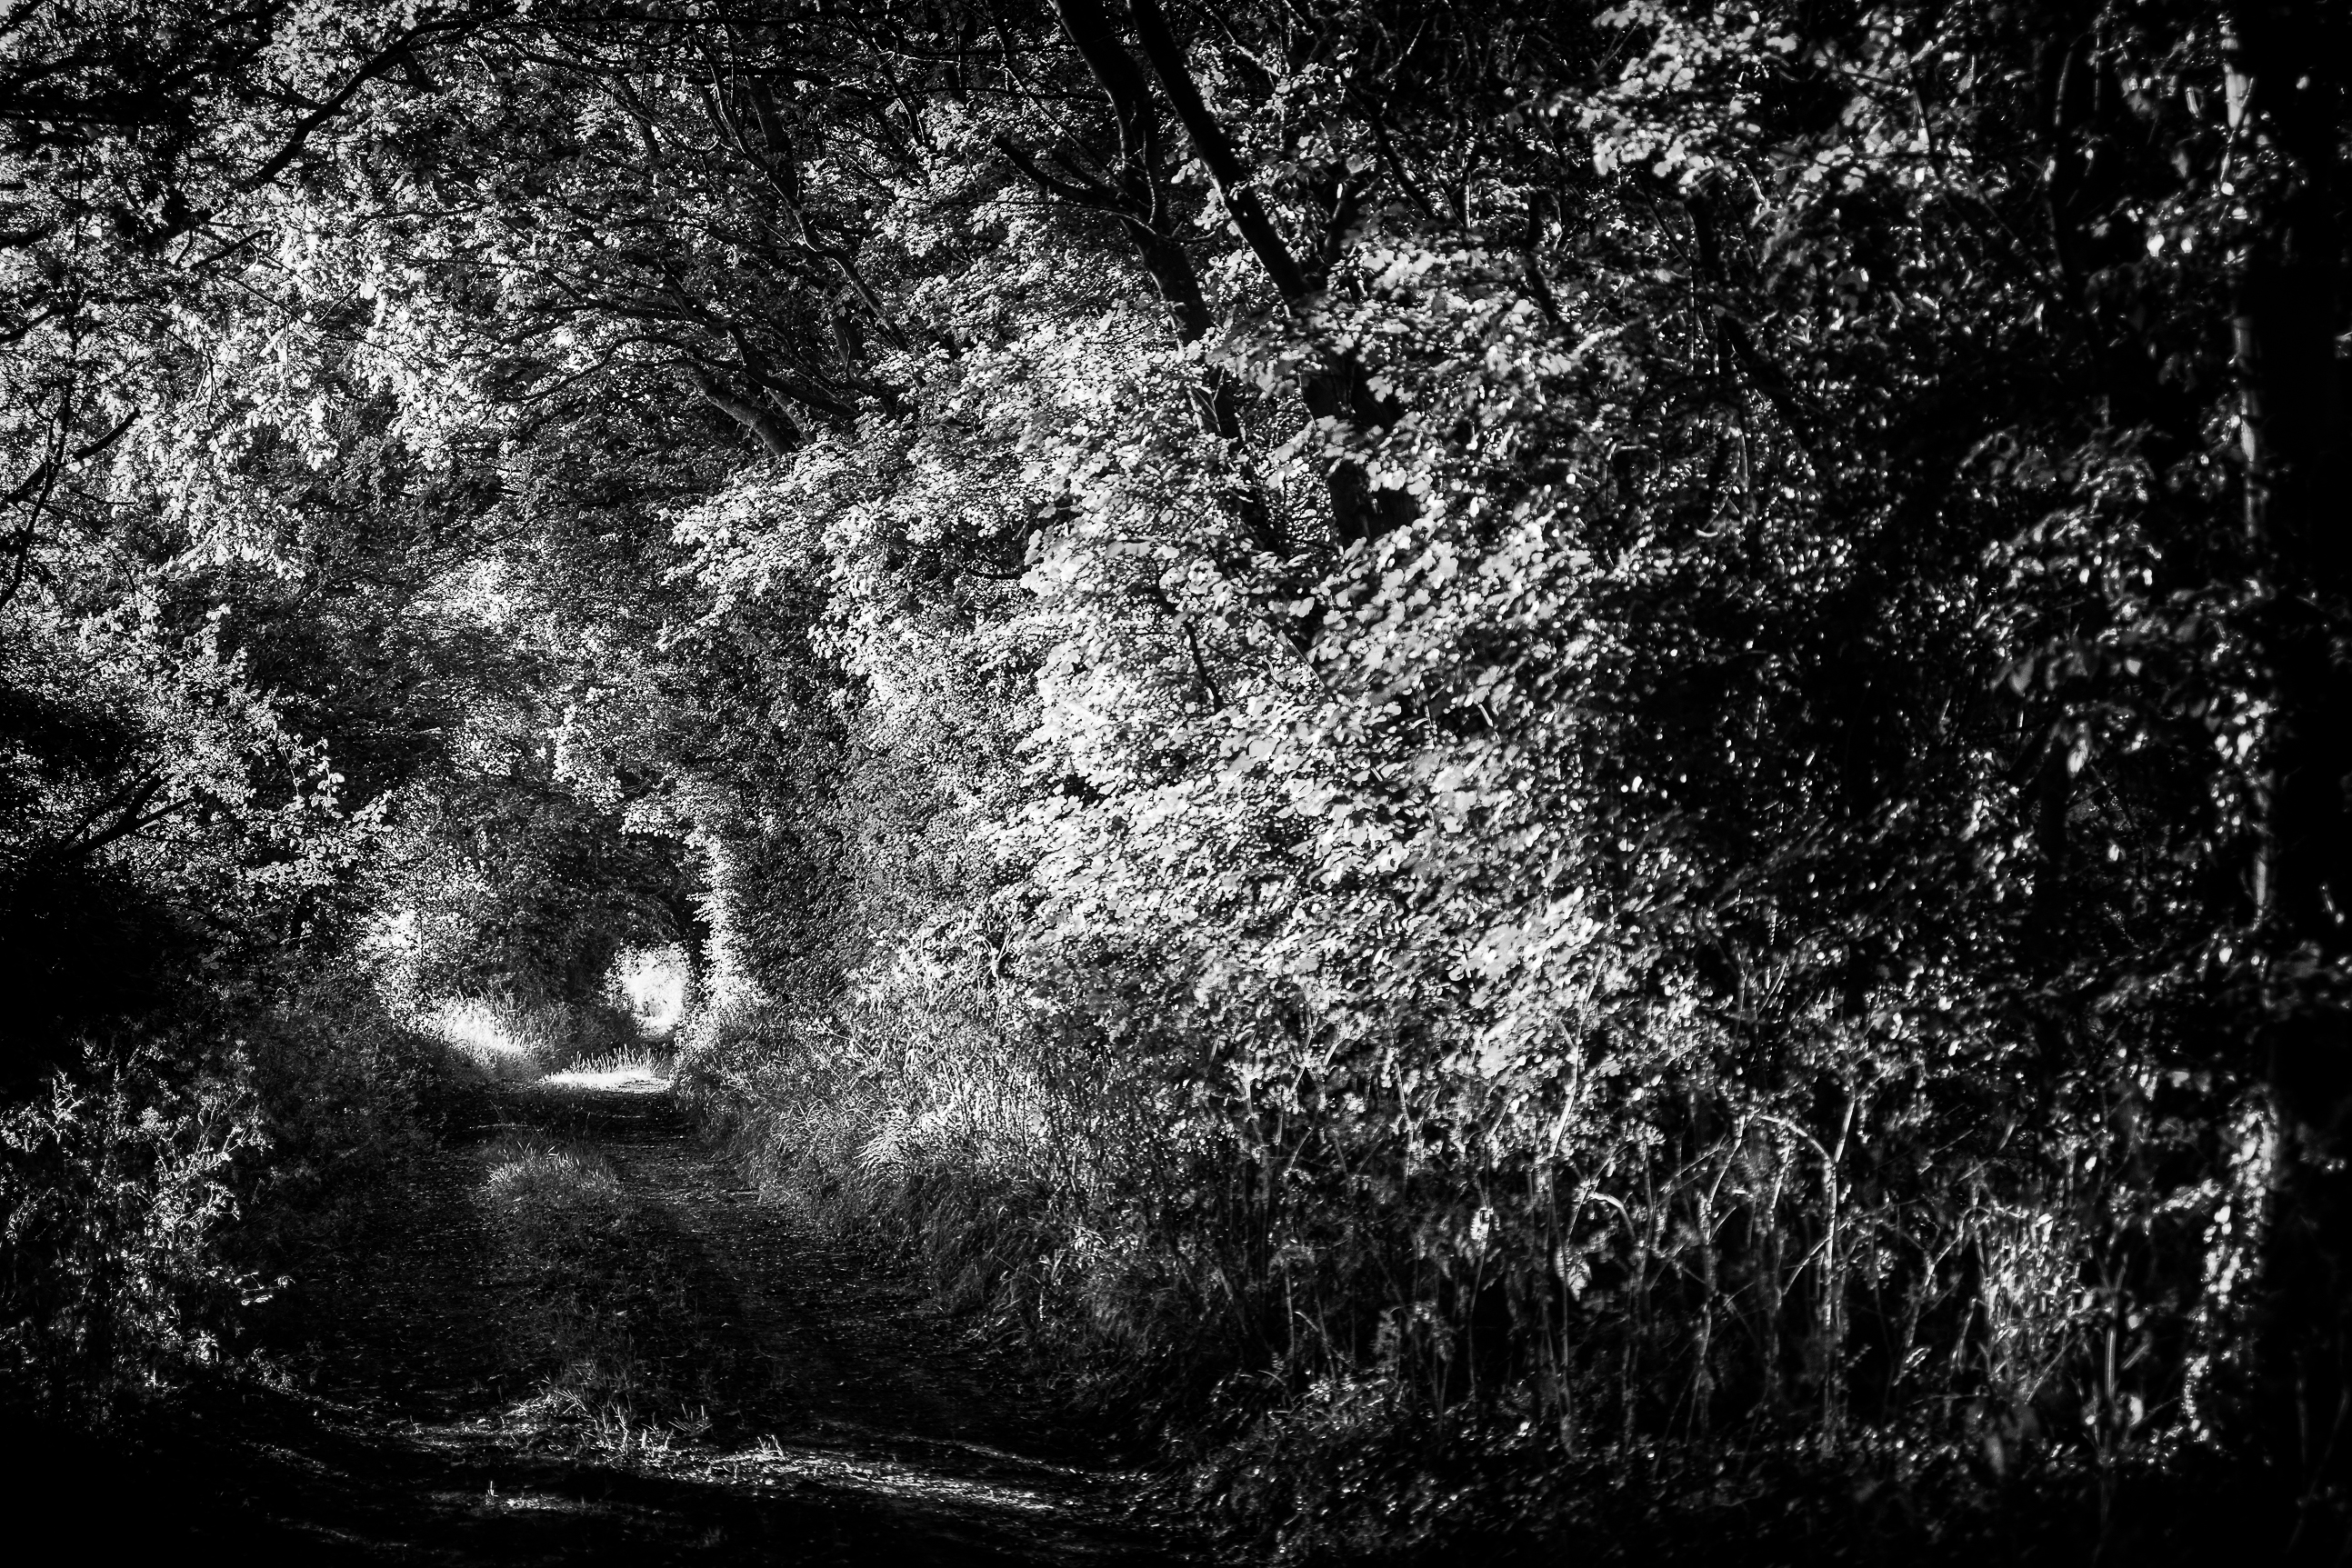
Bier Lane Leica SL with Vario Elmar R f4 35-70 ISO 200

Thanks to

Bill Rosaeur, Stefan Daniel and James Lager for historical / technical information. To Steffen Skopp for his patience in the face of so many questions and to Emma Slack for putting up with so much camera talk.

Thanks also to Sean Reid at Reid reviews for many interesting discussions over the last few months. Sean will be doing a series of detailed articles on the Leica SL with reference both to studio and to field tests. You can read his articles at www.reidreviews.com.

31

Caspar Imperious Leica SL with Leica APO Summicron M f2 50mm, ISO 1250

About this article

This article is not meant to be a critical review. My loyalty as a camera tester is to Leica. On the other hand I hope that I’m an honest correspondent, and I haven’t said anything that I don’t really believe to be the case or left out anything which I consider to be important. Of course I do carry out some detailed tests, but I generally keep these to myself and Leica. However I spend a lot of time with the camera (in this case around 4,000 images). I try and shoot in as many different circumstances as possible which I hope to have represented well with the images in this report.

Also worth mentioning that I have not been paid  by anyone to write this article, and that beyond correcting facts, nobody has had any influence on anything I’ve written – It’s all my own work and there’s nobody else to blame! If you’ve enjoyed reading it, you might like to consider making a donation to your favorite charity.

© Jonathan Slack October 2015

Hollywood and the Decisive Moment, The Leica S (Typ 007)

by Jono Slack

Introduction

In early July I was asked by Leica if I would like to test out the new Leica S (Typ 007) code named Hollywood. I pointed out that I had no experience with either the Leica S, or with medium format digital photography in general, but I was told that would make it all the more interesting! However, it does mean that this is going to be a rather lop-sided article: I can’t compare the results from the typ 007 with the previous S cameras, I can only give my feelings about this camera; it’s unlikely to inform anyone considering whether or not to upgrade, but perhaps it will help other photographers who are considering the new S as their first foray into the larger format.

I am a re-active (as opposed to pro-active) photographer, an observer rather than a planner; I always have a camera with me, and I take photographs as opportunities arise. The often stated idea that medium format photography makes you slow down and think a little harder is a complete anathema to me – the minute I start to think my photographs seem to lose all their life. For this reason I never use a tripod, and very rarely (and only in desperation) a flash.

Of course, I could have decided to use the S ‘properly’, to dust down my tripod, to hire some strobes and to make an attempt at product photography and some formal landscapes, but I would almost inevitably make a hash of it, so that seemed like a pretty bad idea. What I did was to take the camera and lenses to the Latitude festival in Suffolk and to shoot bands and people in just the way I would with any other camera. I decided to try some ‘action’ and candid photography, and a cousins camping weekend in our garden provided a great opportunity for this. All the pictures shown here (and in the accompanying web page) are hand held, and none of them use flash.

It’s worth mentioning that the images shown here (and in the attached link) were all shot with a prototype camera and with pre-production firmware, there have been definite improvements for the production cameras.

1 S0708547Ladybird paddling Pool – Vario Elmar 30-90 ISO 100 f5.7

Ergonomics and Handling

I think that the Leica S is one of the most beautiful cameras ever made – elegant and minimalist, indeed, in the latest camera the shutter speed dial has been changed to a simple dial without any engraved speeds, the only writing left is the rather unnecessary On/Off on its on/off switch – it seems to me that if you can manage to use all the buttons without any clues to their functions, you can probably remember where the on/off switch is!

Whilst the general direction in the camera world is towards more and more analogue controls, Leica have headed in the other direction with the S. Of course, this is so that the user can configure the buttons and dials to their own particular needs, and the annotation of the buttons on the back is shown in the LCD screen. There is also a crystal clear screen on the top plate of the camera which shows all the settings – arguably better to have them all in one place like this than scattered around the camera body.

2 S0708063Lemon Garlic and Courgette: Vario Elmar 30-90 ISO 100 f9.5

The camera isn’t just beautiful, it’s beautifully made, the controls fall to hand really well, and the little joystick at one’s thumb point is extremely useful. Pressing the rear dial to change Mode is also an excellent idea.

I’m not going to talk about the controls of the camera in detail (many readers will already be more familiar with the concept than I am). I did find it fairly intimidating in the first instance, but very quickly the controls become intuitive, and it’s really easy to configure them to suit personal preference.

3 S0707717Geraint Watkins at the Latitude Festival: : 70mm Summarit ISO 800 f3.4 

High ISO and Low Light shooting

The Latitude Festival is a weekend event held on the east coast of the UK, not as big as Glastonbury, but one of the main summer events. Although the S doesn’t seem like a natural camera to use for this kind of event, it did seem to be a great way to find out it’s strengths and weaknesses, and to learn how to use it.

Sadly, the longest lens I had was the 90mm of the 30-90 zoom, and this wasn’t really long enough to shoot the bands on the main stage (even from the press area just in front of the stage). However, a storming set from Geraint Watkins in the Film and music Arena proved to be just right. I used the 70mm summarit and mostly kept the ISO at 800 or 1600 and the aperture at f3.4 with a shutter speed of 1/125.

I was really pleased with the results – ISO 1600 was absolutely fine, and the focus was mostly spot on.

4 S0707863Watching Jon Hopkins: Vario Elmar 30-90 ISO 1600 f4.6

Having got the measure of the camera in low light, I found that shooting at 1600 ISO seemed to have few disadvantages – of course there is a little noise, but it meant that I could keep the shutter speed to manageable levels, avoiding camera shake even in the evening or in overcast light.

11 S0707629Latitude folk: Vario Elmar 30-90 ISO 1600 f4

Auto Focus and action

The AF on the Leica S is pretty good – I haven’t used the previous cameras, but I understand that it’s been improved for Hollywood.

Having the AF on the shutter release did occasionally cause hunting in low light and where the target goes from distant to close very quickly. As a result of this, most of the time I had AF on the toggle button on the rear of the camera (with the camera set to manual focus). This worked pretty well, with the focusing being quick and extremely accurate (even in fairly poor light).

You can always go to MF by turning the focusing ring with the shutter half pressed, this is simple and works very well in practice – I found it even easier than having an MF/AF push pull switch on the lens (like the pro Olympus lenses for example).

The lenses for the S are big, and the elements further apart, so for AF there is a lot of glass to move a long way. On the basis of this I wasn’t very optimistic about tracking with continuous AF. However, as it turns out it works surprisingly well: I spent a weekend shooting badminton and children and dogs rushing around at high speed. I suppose you wouldn’t choose the Leica S as a sports shooter, but I found it worked much more efficiently than I had expected, nailing focus on most occasions.

5 S0708629April: an Elegant Miss : Vario Elmar 30-90 ISO 400 f5.7 

For me, the absolute bottom line with a camera is that it should take a picture when you press the shutter. This seems obvious, but it’s surprising how many modern cameras fail this test, even some expensive modern models.

The Leica S performs really well here – there is no apparent shutter lag, and what you see is definitely what you get.

6 S0708912Walking the Dogs on a dreek morning: Vario Elmar 30-90 ISO 400 f5.7

Viewfinder and manual focusing

There are lots of times when I find AF only too likely to decide on something other than my idea, and focus and recompose has it’s disadvantages in terms of speed and accuracy, so I still find lots of circumstances when manual focusing is preferable.

The Viewfinder of the S is quite simply the best and brightest viewfinder I have ever used, it’s huge and glorious and makes manual focusing a real pleasure. It’s easy to get good focus anywhere in the frame, excellent for candid photography and casual portraiture.

7 S0708769Tom the Hat: 70mm Summarit ISO 400 f8

Image Quality

I found the image quality from the new S to be quite breathtaking – I had the 30-90 zoom and the 70mm summarit, and both lenses seemed to be quite flawless.

I followed my normal practice of shooting ‘Sunny’ white balance during daylight hours and then either using Auto WB or taking a reading from a grey card in mixed artificial light. I was really impressed with the dynamic range, the colour depth and the exuberant feeling the files seem to have. They are also immensely amenable to post processing, with no tendency to fall apart, even under much stress! I wasn’t so impressed with the jpg files, but I didn’t really experiment too much with the different settings, being a RAW shooter at heart. Files were processed in Lightroom (which doesn’t yet have full support for the camera, but which nevertheless works really well). Even really large prints look wonderful, I just can’t imagine a real life situation where one would need more resolution than this.

Black and white conversions work equally well (I use Silver Efex Pro II)

8 S0708868-EditMen an Tol – West Cornwall : Vario Elmar 30-90 ISO 100 f4.7

Conclusion

Generally speaking when writing my camera articles I’m pretty well acquainted with the competition, and I’m aware of the advantages and limitations on either side. In this case I’m only too well aware that I don’t have a full set of information to work from.

I haven’t even mentioned the video capabilities, as I’m not a video shooter – I’ll leave others to discuss the video capabilities of the S.

If you would like a better idea of the technical capabilities of the camera then you should take a look at Sean Reid’s site (reidreviews.com) where he has published Part One of a long term review of the Leica S.

What I can say is that the new Leica S can produce breathtaking files in most normal shooting situations. It certainly isn’t constrained by the conventional limitations of medium format, it shoots fast with accurate AF in fast changing situations, its low light capability is impressive (I found it to be quite useable up to 6400, and that 12,500 was okay in an emergency – I’ve not come across a colour camera that really does better than that).

It’s a wonderful camera which can easily be used as one would use a top of the range Nikon or Canon SLR, but with it’s larger CMOS sensor it produces true medium format quality.

9 S0707970Time for Bed at the Latitude Campsite

70mm Summarit ISO 200 f2.5

10 S0708511-EditApril

Vario Elmar 30-90 ISO 6400 f5.7

The Leica Meet Wetzlar

By ELAN

THE LEICA MEET group of photographers were invited to Wetzlar, Germany on Sep 2nd/3rd 2015, for a tour of the new Leica factory and a conversation with Leica CEO Oliver Kaltner. Twenty four of us came.  All photos here were taken with a brand-new 28mm Summilux-M f/1.4 that Marina at the factory store was kind enough to save for me 🙂 

TLM_Wetzlar-1The new Leica factory.  Back in its original home town in Wetzlar, this impressive building was completed in 2014.  The entrance lobby is enormous, complete with a photo exhibition, Leica museum, a fully-stocked Leica store and the Leitz Cafe across the way.  Open to the public and well worth the pilgrimage.

TLM_Wetzlar-2A peaceful corner in the vast entrance lobby.

TLM_Wetzlar-3The Lenny Kravitz FLASH exhibition.  The exhibition changes every three months.

TLM_Wetzlar-4Waiting for dad… to finish his shopping…

TLM_Wetzlar-5Our factory tour begins with an overview of the building.  Two hundred glass panels surround the building, many of them curved, and each weighing like a Volkswagen.  A glass ceiling above the lobby is designed to let light in but prevent shadows from falling on the interior, especially on the exhibition.  The building is green and high-tech and functional and beautiful.

TLM_Wetzlar-6No photos beyond this point!

The tour focused on what it takes to make lenses – the incredibly tight tolerances, the quality of the glass, aspherical polishing techniques, the high-tech (and low-tech) machines, and the amount of manual labor required to put a lens together.  No wonder they cost so much.

TLM_Wetzlar-7A conversation with Leica CEO Oliver Kaltner:  “It’s all about the image” and “The Leica M will remain pure – like the Porsche 911”.  Let’s hope so!

TLM_Wetzlar-8A working replica of Ur-Leica (“original Leica”), from 1914.  The original is stored in a bank vault and said to be worth millions.  This camera invented 35mm photography.  Below there’s a photo of the spot in Wetzlar where Oskar Barnack took his first photo with this camera.

TLM_Wetzlar-9A stroll through the Leica museum.

TLM_Wetzlar-10Every Leica camera ever made is on display.  Hundreds of cameras and lenses.

TLM_Wetzlar-11Children’s competition decorating a Leica M.

TLM_Wetzlar-12Show up unannounced at the Wetzlar Leica factory for simple service and they will do it on the spot.  Usually for free.  A dozen of us handed over our gear for sensor cleaning, lens painting and various tightenings, and it all came back fixed within a couple hours.  What other company offers you this service? Stephen Cosh getting his Leica back as Gunnar Johnsen waits for his.

TLM_Wetzlar-13Gavin Mills waiting impatiently for his 35mm FLE to come back from the paint shop… the number 7 wore out of Gavin’s focusing ring so they repainted it back in and touched up other faded paint.  Took an hour to dry.  Looks new now.

TLM_Wetzlar-14The main square in Wetzlar.  The night before it was full of people attending a concert.

TLM_Wetzlar-15A humbling moment to stand on this spot and take a photo with a Leica M.

TLM_Wetzlar-16This photo is taken standing on Oskar Barnack’s plaque (see above).  Oskar’s photo (which was taken with a lens longer than my 28mm) is much better than mine.  It can be seen here:  https://artblart.files.wordpress.com/2015/01/1913_oskar_barnack_wetzlar_eisenmarkt-web.jpg

TLM_Wetzlar-17The Meet organizer, Olaf Willoughby, at dinner with Fatima Salcedo at the Haupt Wache.

TLM_Wetzlar-18A group photo after dinner at the steps of the Haupt Wache.  Twenty photographers couldn’t pick a better setting? 🙂  Later, another group photo was taken in the square… see Gavin Mills’ photos.

TLM_Wetzlar-19Our friends from Switzerland heading back to the hotel after a long and wonderful day.

TLM_Wetzlar-20Early morning coffee by the river, at our hotel.

TLM_Wetzlar-21The Leica Meet bus to Marburg for a morning shoot.  We spent half the time sitting in Cafes 🙂

TLM_Wetzlar-22Welcome to Marburg.  It’s a nice day!

TLM_Wetzlar-23Stephen Cosh shooting the cathedral at Marburg.  Rolle Machtmabass captured some impressive photos of this cathedral…  look them up on Facebook.

TLM_Wetzlar-24Elisabethkirche – the cathedral at Marburg.

TLM_Wetzlar-25Walking the streets of Marburg.

TLM_Wetzlar-26Gunnar Johnsen in action.

TLM_Wetzlar-27Gunnar Johnsen and Gavin Mills discuss the fine art of photography.

TLM_Wetzlar-28Street photographers.

TLM_Wetzlar-29Gavin Mills shares a photo with Fatima Salcedo.

TLM_Wetzlar-30I missed this shot… but it demonstrates the wonderful soft bokeh of the new Leica 28mm Summilux-M ASPH f/1.4.

TLM_Wetzlar-31Leaving our hotel – Landhotel Naunheimer Mühle – just outside Wetzlar.

TLM_Wetzlar-32Autobahn, at 150 km/h, on the way back to Frankfurt airport. Many thanks to Marcel Wizenberg for the ride!

Exploring Street Photography, part two

blur01

Part 2: Snatching Order Out of Chaos by Olaf Willoughby

What makes a good street shot?

A recent article in the Huffington Post was entitled, ’Street Photography Has No Clothes’. As the author clearly intended, it sparked a lot of controversy. In it, he decried the lumping together in one category, of the work of time-honoured masters with the ‘hundreds of thousands of dull, hackneyed candid images of random strangers by hopeless photographers’.

Let’s set aside the sensationalist language and put it down to a Bruce Gilden-like attempt to bring out the ugliness in others. There’s an undercurrent in society today that yesterday there was a better quality of life. Today everything is being ‘dumbed down’. Does that apply to Street Photography too or is the author just taking a cheap shot?

wait11

As with the debate over photo manipulation, we’ve been here before. Edward Weston wrote critically about, ‘… hundreds of tired businessmen, tradesmen and idle women who play with photography as a holiday hobby – and then offer their results as art’.

And on the subject of art. Regarding the introduction by Kodak of the hand camera in 1888, John Szarkowski, MoMA noted, ‘It was a common article of faith that art was hard and artists rare; if photography was easy and everyone was a photographer; photography could hardly be taken seriously as an art’.

So the author of the Huffington Post article was following in a tradition of criticising the democratisation of photography? Except for one thing. The situation today is radically different.

First, the so-called ‘hopeless photographers’. Think bandwidth. The ubiquity and convenience of the web and the iPhone have changed our visual culture and in the process, photography forever. Consider the narrow media options available through the first half of the 20th Century. People showed prints in a photo album, sat in a dark room to watch a Kodachrome slide show or joined their local camera club. To get work shown nationally or (almost unimaginably) internationally; meant being featured in a magazine or a gallery show, both of which were hard.

selfie with nelson

Then, in 1992, the world changed. The first photo was uploaded to the internet. Lulu and Blurb print on demand came along in 2002 and 2005 respectively when Flickr also started. In 2015 we’ll take 1 trillion photos and by 2016, 2 billion people will have Smartphones. We can no longer compare like with like. Go and stand in a busy street. Look around. We have become a screen based culture. Image trends like selfies mark the evolution of a new visual shorthand where the globe is our gallery.

Where Weston spoke of ‘hundreds’ we are now talking ‘millions’ and as Facebook had 1 billion users on line on Aug 24th, no doubt that will grow further in the next few years. Of course in this avalanche of images it is  easy to criticise a lack of artistic intent. But the new reality is that taking a photo is a natural part of everyday life. Possibly these people don’t want to be Winogrand, Maier or Erwit? Maybe they just enjoy taking and sharing pictures? And why not?

street graphics02

Let’s turn our attention to the ‘time-honoured masters’. So, when did great Street Photography cease? Yes many of the great names were and still are geniuses but here’s an interesting thought. I believe there are many photographers today who are the modern day equivalents of the great masters.

The problem is they are hard to find because of internet fragmentation and the fact that the biggest gallery, curator, critic and collector communities prefer conceptual or cause related documentary work over contemporary street images. In fact we are in the midst of an explosion in photographic awareness and education and it is my contention that Street Photography is alive, well and flourishing with modern masters. Check these websites for examples:

http://www.theleicameet.com/ – (disclosure, I am one of the founder members of this group)

https://www.lensculture.com/ – a truly authoritative resource for contemporary photography

http://www.in-public.com/ – whose aim is to promote/explore the possibilities of Street Photography

new street 3

Let’s return to the opening question.

What makes a good street shot? Let’s assume technical competence and a measure of originality…i.e. more than just a picture of people in the street.

Good Street Photography should contain the same basic qualities that make any photograph or indeed any work of art successful. It possesses an energy, something which attracts and engages the viewer. This can be as momentary as a humorous gesture or as meaningful as posing a question for the viewer to answer. After all, one definition of art is that it leaves space for the viewer to interact with the work.

Henri Cartier-Bresson gives us a clue as to what lies in this space. In the mid 1960’s, HCB went through his life’s work at Magnum intent on destroying most of it. Martinez, Delpire and Gassman persuaded him to let them edit his work instead. Even then he still rejected images he felt were, ‘too perfect – they don’t have enough ambiguity’.

10154182_10152748212727796_1997292595_n

Good street shooting achieves this ambiguity by recording a split second which symbolises our humanity. A hand movement, a look, an interaction which is instantly recognisable when we reveal it to others. We pass through a thousand of these moments of drama everyday, mostly without noticing them. We screen them out to get on with our lives.

There are dozens of ‘split seconds’ on the street to choose from. In this post I’ve chosen eye contact. It can of course be posed or candid. As I mentioned in part one of this series, I’m comfortable with a loose definition of Street Photography, so either works for me. However the images posted here are all candid.

I used two main techniques; shooting from eye level and from the hip. (If you’re a seasoned street shooter please look at the photos and skip to the end. You’ll know most of this already!)

new street 38 ec

Shooting at eye level is straightforward, although I prefer to move slowly or even station myself somewhere and wait for an interesting moment. I feel less intrusive if people come to me, rather than me appearing to be ‘stalking and hunting’ for images. But this is purely personal taste. Your style may vary.

Shooting from the hip, chest, elbow is based on zone focusing. So I set my Leica M240 to ISO 800 and my favourite 24mm Summilux focusing ring at 2m. Then I know that at f4, everything from 1.4m to 3.4m will be acceptably sharp. It’s as good as and arguably better than auto focus where I can’t be sure where the focus point will lock.

new street ec 41

The magic of shooting Street Photography is that we become attuned to noticing and capturing these brief instants.

The wonder of viewing Street Photography is that it snatches a moment of order out of the chaos of the commonplace.

In fact let me edit that. I’ll take a hint from HCB and change that last line to ‘snatching a moment of ambiguity out of the chaos of the commonplace’.

In part 3 of this series I’ll be looking at different approaches to capturing that ambiguity in Street Photography. I hope you are enjoying it so far.

PS: Street can be a divisive and emotional subject. There are no eternal rules of right and wrong. All artists and genres of art shapeshift through time and this article simply represents my opinion at this moment. I appreciate that your views may vary and that’s fine.

Tech note: all images made with Leica M series cameras, except the opening street scene (iPhone).

Olaf Willoughby

Olaf and Eileen McCarney Muldoon are co-teaching a Street Photography workshop, “Destination Brooklyn, Unlocking Mysteries”, Sep 21 – 24th. email me at: olaffwilloughby@gmail.com or more information: https://slate.adobe.com/a/z6nZD

PART 2: WORKING WITH FILM IS NOT HARD!

by David Matthew Knoble

This is part two of a two part series on black and white film. This part dives into the cost of using film and the workflow of developing film and scanning the negatives for digital processing thereafter. Techniques like this can be dry reading, so bear with me and I’ll do my best to keep things interesting!

Cost?

After someone gets over the fear of working with chemicals and light-sensitive film, they frequently ask me about cost. In so many ways, film work is less expensive than digital work. Even ignoring the typical desire to upgrade a digital body every two years, film can be less costly even in the long run.

Image01

Image 1 – Get over the fear of developing film – Leica M4 with Summicron 50, Ilford Delta 100

A Leica M film camera can cost as little as $800 but I would recommend investing $1,000 to $2,000 for one that is in good shape and does not need a calibration as soon as you buy it. Using a Leica Store or other reputable group that checks out equipment is typically more reliable. However, if you haven’t already guessed, the cost does not stop there.

In the grand development scheme, the next most expensive equipment purchase would be a scanner. Luckily, there are commercial centers to get negatives scanned. You can always look for a local photography club that works in film and get help. If not, you can drop between $600 and several thousand for a film scanner. There are even two Hasselblad film scanners costing more than a Leica M60!

Development is a different matter. A few beakers, a development tank with reels, a timer and thermometer can be purchased for $200 or less depending on the type of timer you use. Otherwise, everything else you need is purchased as you use it.

Film costs typically less than $10 per roll and chemicals (developer, stop, fixer and wash) are less than $100 for everything. Chemicals last for different periods of time and numbers of rolls, so expect to order chemicals every now and then.

Image02

Image 2 – 1000ml beakers labeled for Developer and Fixer, two Honeywell Nikor steel developing tanks, plastic measuring cups, squeegee for removing water and hanging clips.

You can also buy a bulk loading container and re-usable film cartridges for well under $100 and reduce your cost per roll of film by about 1/2. It takes practice, but I bulk load 90% of my film now. In fact, I bought two bulk loaders on eBay for $20 each.

If you don’t mind shelling out a few dollars and really want a nostalgic treat, try using the old Leica brass film cartridges (FILCA and IXMOO). I have a dozen of the IXMOO which work in my Leica IIIC. They work in M bodies up to some early M-6 models. They are a joy to load and use. I also splurged on a Leitz film cutter and negative template to cut the tabs on my film.

Image03

Image 3 – Leica IXMOO, Leitz film cutter on top of Leitz cutting template.

The bottom line is that black and white film cost is easily spread out over time and doesn’t have to cost a mint. You can also gradually add the more expensive equipment and do more yourself. The choice is yours!

Favorite Films

I like smooth tones and sharp images. Unfortunately, with film you typically get one or the other unless you use extremely slow films with very specific developing chemicals that are harder to find and more expensive.   Back in the 1970’s and 1980’s everything I used was Kodak. There was all kinds of Pan-X, Tri-X and other X films and D-76 was the developer of choice. These films had reasonable contrast and smoother tones, but were not the sharpest of films. Along comes the T-Max films with a different grain shape and a new developer. My personal opinion is that the grain was more evident in the film, but the image was sharper.

Image04

Image 4 – Feeding the squirrels – Leica MP with Summicron 35 ASPH, Ilford FP4

Today, my favorite films are the Ilford varieties. I use FP4+ which is rated at ISO 125. I shoot that film at 125 because it matches shutter speeds perfectly, no 1/3 stop or 1/2 stop conversions. (Remember Sunny f/16 says 1/125 second at f/16). This is a classic smooth and contrasty film. I use Ilford DD-X developer and Ilford’s fixer because they are well matched with the Ilford film and provide not only sharp negatives but allow me to change speeds with some films. Other developers are more restrictive. I also use Ilford Delta 400 speed film. This is a slightly more grainy film, but sharp. More importantly, with the DD-X developer, the recommended ISO is 500. Once again, shutter speeds are easy to convert. With the DD-X developer, the Delta 400 can be exposed between 200 and 3200 so it is very versatile.

I will occasionally shoot the Ilford Delta 3200 for fun and I have really taken a liking to the Fuji Neopan 100 Acros film for two reasons. First, it has an impeccable level of detail and smooth tones, and second it is a thinner emulsion (plastic part that becomes the negative) so more light gets through when scanning and blacks are much darker. It is a little more picky when putting on a reel to develop, but creates superb images. Oh, and yes, we cannot forget Kodak Tri-X although it is tougher for me using ISO 400 which doesn’t match a shutter speed.

My Workflow

I won’t lie to you, developing film takes time. In fact, it takes a lot longer than a digital process. This is why we see so many more digital images on the web today. But, taking the time is rewarding as I’ve already said, so let’s dive into my workflow. Others will have different opinions, and that is ok.

Image05

Image 5 – Various containers hold Fixer and Archival Wash beside actual chemicals used in development.

Developing film is a little like being a chef. Each photographer has their own recipe and they will swear by it. If the results are great, then the recipe works! So, don’t worry about exactness, but worry very much about consistency. Developing is about being able to get the same results every time.

For example, I agitate my film the same way, every time, no matter what! Agitation is inverting the tank while developing to put fresh chemicals in contact with the film. I agitate mine 4 times in 10 seconds every 1 minute. I also agitate 4 times as soon as I pour the chemical in the tank. Turning upside down and then right-side up is one agitation. It’s almost like a dance move!

Ilford has great literature available to read about its film, developers and the process. I have all of them on my iPad for easy reference. After shooting the film, it has to be developed, dried, wiped of dust, scanned and imported into Adobe Lightroom. From that point on the images sit right beside and mixed in-between my M240 and Monochrom images.

Development

Developing is really just chemistry. I have acquired some 1000 ml plastic beakers and various dark brown plastic storage bottles to mix and use chemicals.   While I have begun using my iPad for a timer, I still pull out my old trusty, large number, Gralab timer (If you’re over 40, you know that a Gralab timer is akin to a Gossen Luna Pro).

Image06

Image 6 – iPad using Massive Development Chart and trusty GraLab Timer

My laundry room has a large stainless steel sink (which I installed on purpose) and a countertop. The two real keys to developing are the temperature and age of the developer; and the amount of water you use (I believe in conserving resources). Of course, you must also be consistent (Have I said that before?).

So, if you’ve never done it, developing film goes something like this:

  1. mix chemicals and put developer and fixer in refrigerator to cool down
  2. put stainless steel tanks and film inside a black bag to keep out all light
  3. with arms inside, take apart film cartridges one by one and put on reels
  4. remember to close top of tank before opening the black bag!
  5. pull chemicals out of refrigerator and read temperature
  6. look up development time for that temperature, film and ISO
  7. set timer for development
  8. develop, stop, fix, wash, archival wash, final rinse, rinse aid (now you are a chemist!)
  9. hang to dry and squeegee to remove water
  10. scan dried negatives to computer
  11. cut negatives and put into archival sleeves for permanent storage
  12. import into Lightroom and start having fun!

This does seem daunting at first. However, except for a scanner, the materials are extremely inexpensive. Less than $100 can get you started if you use an iPhone timer.

There is an app called ‘Massive Development Chart’ [http://www.digitaltruth.com/devchart.php] for the iPhone and iPad that has a large number of films and development times for even more developers. It has a conversion calculator for not only adjusting times to temperatures, but if you have to mix developer at a ratio of 1:4 (1 part developer to 4 parts water), you can put in the volume (32 ml for example) and it tells you how much of each you need! You can also adjust any of the development times to suit your needs. I find the adjustment is not the same as the Ilford charts, so I customize it to the charts.

Image07

Image 7 – Two bulk loaders from eBay, film cartridges for my Leica MA and Leica MP with scissors, masking tape and a wrench to remove tops from disposable film cartridges.

I have gotten the process down now so that I can develop two rolls of film in one tank in a little over 40 minutes start to finish, meaning the negatives are drying and all the beakers and tanks washed. Some would chuckle, but I literally pour chemicals into the storage tanks and put them away while the next chemical is doing its work. So, by the time I’m washing the negatives, all the chemicals are put away and I only have to wash the beakers.

For the really detail minded, I put developer in the refrigerator until it is about 68 or 70 degrees F. I mix between 500ml and 1000 ml of developer to try developing at least 4 rolls of film each time and frequently 6 or 8 rolls. I’ll develop two rolls, put the developer back in with the unused amounts, and then develop two more rolls at 140% of the development time, adding 20% more for each two rolls thereafter. I won’t bore you with all the details, but the chemicals get used up, so there are some tricks to making the most of the developer. Ilford has great PDF’s on this process, so I cannot take credit for it. Ilford has another great PDF on washing which uses much less water than conventional methods and still gives archival quality rinses.

Scanning Negatives

Scanning is the best part in using film, because you finally get to see what you created! I actually dry my negatives on a hanger in a doorway with a white door as a backdrop so I can peek at the negatives. However, until you get them scanned to a screen, you cannot tell if they are in focus or scratched.

I have been using a Nikon CoolScan 5000 ED [http://www.nikonusa.com/en_INC/IMG/Assets/Film-Scanners/2010/9238-Super-COOLSCAN-5000-ED/PDF/COOLSCAN_Brochure_1007.pdf] for over 10 years. I bought some extras so I have a reel in the back that allows me to scan an entire roll of film, uncut. The scanner feeds the frames one at a time and rolls them up in the back to protect them. When I’m finished, I just cut the negatives and store them. The big advantage is I can go do something else while the scanner works for me!

If you buy a scanner that only uses cut negatives, be sure you know how long a strip it can scan. Nothing feels worse than setting up a new scanner and then learning it will only scan strips of 5 frames while all yours are cut with 6 frames.

Mt. Rogers Backpacking Trip

Image 8 – Wild ponies at Grayson Highlands near the Appalachian Trail, Leica MP with Elmar-M 50 f/2.8 Collapsible.

The Nikon scans to 4,000 DPI and has a maximum density of 4.8 (says Nikon). In practical terms, the density appears more like 3.8 or 4, but that is still great. This scanner also uses LED’s for a light source so the negatives stay cooler which means the focus remains constant. Also, it means you don’t need spare bulbs!

The ED model scanner which I use also has better glass to focus the negative which means less chromatic aberration (sound familiar?). The scanner will allow me to sample each area multiple times and average them together which helps avoid noise in the image file.

This scanner is expensive and cost me over $2,000 years ago. But, it is one of the best mid-level scanners available until you step up to the Hasselblads. It’s not only convenience, but the dynamic range is so good that poorly exposed negatives can frequently be saved.

Image09

Image 9 – Titled, ‘Number 42’, Leica MA with Summilux 35 FLE, Ilford FP4

The Nikon software does not work with a Macintosh anymore, so I had to find alternate scanning software. I settled on VueScan although there are some other great products. VueScan allows me to use all of the functions built into the Nikon scanner and also outputs a DNG file. I save a setup file for each film type I scan and it allows auto numbering of the scanned files making batch scanning simple.

What does all this scanning stuff mean? For an investment that is still less than a new digital Leica M body, I can get digital quality film files. My scanned DNG files are about 40 mb, or what an uncompressed 18mb full frame sensor produces from my Leica M240! Once these DNG files are stored on disk, I back them up and import them into Lightroom just like my SD cards. From there, the workflows are all the same.

Dust

Oh what a bad word! Dust. A film developers nightmare is dust. I use Ilford anti-static cloths to clean negatives before scanning and I scan as soon as freshly developed negatives are dry, but dust still creeps in the system.

So, Lightroom spot adjusting is inevitable! Dust is like the Borg – Resistance is futile. However, a few things can help keep dust to a minimum. Use a water additive in a final rinse so that no water spots form while drying which become dust magnets. Dry negatives away from major walk areas and do not run your clothes dryer while negatives hang helplessly nearby.

Image10

Image 10 – Leica MP with Noctilux 1.0, Ilford FP4.

Scan quickly and use an anti-static cloth. While I cannot yet vouch for a negative dust vacuum, I have purchased one for 35mm negatives and in a few weeks I should be able to run a strip of negatives through a small steel vacuum that uses ions and anti-static brushes to remove almost all dust before scanning. Its another investment, but less dust means less software cleanup and less time.

Adobe finally added the ability in Lightroom to not only remove spots, but to draw a line with a brush which clones another area just like spot removal. This works splendidly on scratched negatives. Get used to spot removal though, because even the best scans have a little dust.

Tips

If you are already working in film, here are a few tips that I’ve learned over the years:

  1. Be sure the film is really loaded. Put the film in the camera properly, close the bottom and wind one frame. Then use the rewind know for a couple of turns to take up the slack. Wind the next few frames to get to frame 1 and watch the rewind crank to be sure it is turning. If not, you may not have loaded the film. There isn’t a worse feeling than developing a blank roll of film.
  2. Be sure you take of the lens cap! Same as number 1.
  3. I use a combination of disposable film cartridges, reloadable cartridges and the old brass Leica cartridges (in M-4 and below, or my case the IIIc). Bulk film is really cheap, much cheaper than buying rolls one at a time.
  4. I love the stainless reels that have no clip to hold the end of the film. Those clips frustrate me to no end! The other reels have an opening and you just put the loose end in. I can put two rolls of film on reels in about 4 minutes.
  5. Cup your hand around the film when you are winding it in the reels. It will allow it to easily expand back out into the sides. This is probably the hardest part of film photography. Personally, I do not like the plastic reels that turn back and forth to load the negatives. I think the jam too much and scratch the negatives. But, use whatever you can consistently load the film well with. Practice with a blank roll of film you can expose to light.
  6. Use your developer in 24 hours and throw it away. Oxygen kills developer and developer is what makes the image show up in the negative. Old developer lowers the contrast and removes detail in the shadows. Fixer lasts longer and stop bath lasts until it turns a dark color (a long time).
  7. Practice by shooting film and developing it. Shoot a roll and develop it. A single reel tank uses about 16ml of chemicals. You can see what you are doing wrong and adjust it. That is what breeds confidence.
  8. Scan your film as soon as it is dry. I use an Ilford anti-static cloth to lightly (very lightly) wipe the negative before scanning to remove dust. Dust takes a long time to remove in PS or LR, try not to scan more dust than you have to.
  9. Store your negatives well. Put them in archival negative sleeves and label them while you still remember what they are. This is your backup. One day when we have 80mb scanners at 10,000 DPI, you can rescan your negatives. There are some images I have in Lightroom that are almost 30 years old, but now are digital.
A 2013 snowfall made for perfect portraits of my bride.

Image 11 – Kelli in the snow, Leica MP with Summilux 50, Ilford FP4

Conclusion

Practice makes perfect, so borrow materials until you get it down and find out what you want to buy. The reward is something you made from scratch and the dynamic range and detail is just as good as digital. It takes awhile, so take a lot of pictures around the house or just for fun and develop them. Keep notes on what works and try to find ways to speed things up so it remains fun. Happy developing!

David Matthew Knoble. August 2015.

WHY SHOOT FILM? – part 1


Leica IIIc - 8th Grade RHS Painting Woolworths Facade

Img 1 – High School Students Painting a Construction Wall on Main Street.

By David Matthew Knoble

The young 9th grade boy was one of three onlookers as I showed my camera to his teacher. It was 11am and I stumbled on a high school art class painting a construction wall on Main Street. After taking about three frames I struck up conversations. I had just explained what camera I was using after the teacher remarked, ‘That’s a Leica!’

The young boy casually asked, “can I see the pictures you just took?” Replying with a grin I told him, “No, this is a 1949 film camera, I have to develop the pictures first”. His volley continued, “so is their a display on the back where I can see the pictures?” I turned around my Leica IIIc with a 35mm Summaron attached so he could see the shark skin leather back. He shrugged his shoulders and went back to painting.

It was easy for me to understand where this lad was coming from. Technology has changed considerably since my first box camera and no high school student knows what a rotary dial phone is anymore. What amazes me more is the number of adults that might have the same conversation with me. So why would I shoot film with a dinosaur? I’m not going to pontificate on the resolution of film versus digital or the exposure latitude. The reason is much less complex. But, to test your skills, see if you can tell which of the images here are from film and which are pure digital.

Camp Daniel Boone

Img 2 – Sword Fighting at Summer Camp

The art of shooting film has enhanced my photography skills every year. I spend almost equal time shooting film as I do digital. The pure-bred digital cult is quick to ask me why I would spend so much time bulk loading film cartridges, winding exposed film around reels inside a black bag, checking the temperature of freshly mixed chemicals against tables and charts while piling up beakers like an Iron Chef cook off. My answer starts out simple – it’s because all that work forces me to slow down and think and I get better photographs as a result.


Computer Chip = My Brain

My film cameras have no computer chips and no batteries. My brain does the work. Bright sunny day? No trouble! ISO 125 means 1/1000 second at f/5.6. Start shooting! Yellow filter? Take it down to f/4.0.

Phtographing Dads

Img 3 – Dad’s Taking Prom Pictures

Even if using a light meter sometimes or all the time, converting film speed and light to the proper manual exposure exercises your thinking muscles. After a time, it gets really easy. More importantly, it carries over to my M240 and Monochrom.

Too often in today’s technology I believe we rely on a computer to think for us. It would be easy to let the M240 set a shutter speed for me. But it is a reflective meter and that backlit subject just came out too dark. Ok, open up a stop and shoot again. Still too dark? Try one more stop. Peeking at the LCD in between exposures and shielding the sun with my hand it looks like I finally got a good one.   It’s a shame it took so long that I missed the shot I originally wanted. Working with film can help alleviate some of that trial and error when a reflective meter doesn’t work.


Film Breeds Confidence

Someone wrote recently about One Shot Harris.   What a great name! Harris was known for only taking one shot because it was all he needed. The Pittsburgh newspaper frequently published several of his images each issue. If you work with film long enough to get the right exposure you have developed confidence – the same confidence needed to use something like the M60 with no LCD.

Without confidence, I might shoot 8 exposures of one scene varying f/stop and shutter speed just to make sure I got one image that comes out properly. Almost sounds like running a digital camera at 3 frames per second for a few seconds to get just the right shot. Checking the LCD let’s me make sure I captured one I like and re-shoot if necessary. Film, on the other hand, makes me wait until development to see if I made the right choice for exposure.

Image4

Img 4 – Water Hats to Cool Off at Summer Camp

See the image below. It’s from Summer Camp and the boys were really hot, so it was time for water filled hats to cool them off. I was using an M-4 with a Summicron 35 attached. I set the exposure, focused and waited. When they put on their hats, I snapped the shutter. It was two weeks later until I found out I got the shot. I only had one chance and I only took one image. That’s confidence.

This same confidence spills over to a camera like a digital M, adjusting when necessary. Yes I chimp some like the best of them.   But I don’t need to and that’s key.


Handling the Unexpected

I spent early July in France alternating each day between film and Digital. The day we walked through Montemarte I was using my Leica MP to keep weight down. I would use the built in meter to check the grass or dark blue sky for middle grey. Half way through our walk, my battery died. I kept shooting using the Sunny 16 rule and got about an 80% keep rate on exposure. That gives me confidence. Here’s a shot below from that walk.

Image5

Img 5 – Montemarte

A year ago, I wouldn’t have thought of wasting film by guessing. Today, my guesses are much more educated and while I stop and think, I don’t mind trying. There are some great sunny 16 charts on the web that provide guidance down to candlelight, or a dimly lit room inside a house. The only way to master this type of shooting is to try it and then develop the roll quickly while everything is fresh. Adjust your thinking and shoot another roll.


Film Gear

I still carry an incident light meter with me set to ISO 125. I’ll be randomly walking and guess at the light level checking it with my meter. I use a Sekonic Studio Deluxe II which has no need of a battery. It’s the old dial and needle concept, but I find it easier to read and you can read EV directly off the dial. This is an easy practice method with instant feedback and no waste of film. I also love the Sekonic L458dr because of the spot meter built in and the Gossen Starlight which has a zone measuring mode.

Group Study

Img 6 – Coffee Shop Study Group

While I use Sunny 16 for most shooting around town, landscape work is different. The zone method is impeccable for still life. The point is the subject is still so you have time to think. Zone work with rolls of film is challenging. So, I modified my approach for bulk work. Instead I just spend much more time setting an exposure.

I measure the dynamic range of the scene and set middle grey. When I use the Gossen, I meter a tone and set it to a zone on the display. Each other area can then be measured and the zone it will fall under will be displayed. It’s an easier dynamic range exercise. I cannot over emphasize the value of colored filters. I use yellow and green colored filters. These improve contrasts and overall quality of the negative. You can experiment here with digital RAW images and Lightroom. The same concept applies!

St Johns USVI

Img 7 – Hear No Evil, See No Evil, Speak No Evil

Image8

Img 8 – Playing at the Pirate Ship

I have used a variety of manual film cameras over the years and some have stuck with me. I started with an M-4 and then added an M-6 ttl. As digital took hold, I sold some older cameras. I bought an MP which I have taken backpacking and love the mechanical nature with a light meter built in. Then I added an M-2R which I loved but eventually sold because my aging eyes didn’t like the yellowing of the rangefinder. I also started using a IIIC which has two windows, one that is zoomed in, making focusing easier. But I have to say my favorite is a chrome black M-A with the black chrome 35 summicron and 50 summilux. The clarity of the finder and heft of the body is great!

Conclusion

I really enjoy using film, but I also grew up using film. In fact, most people that did start with film still use it occasionally. My hope is that some digital-only folks will give film a try. Even if the film is commercially developed and scanned, you learn the skill and patience.

For those that think film is dead, ask the product development team at Leica. They saw fit to give us two models of strictly mechanical film cameras – one in chrome and one in black. Leica also still offers the MP and M7, so four bodies are available. Film is not even close to being dead.

Slow down. Treat an SD card as a limited resource and the shutter as a one-shot device. Concentrate on getting the right exposure and timing the shutter release just right. That is the skill of a great photographer! Now go shoot a frame or two. In Part II I’ll talk a little about my development and scanning techniques.

David Matthew Knoble

Ok, did you decide which images were from a film camera? All are from a Leica of course and the list of cameras and lenses is below.

Img 1 – 2015, Leica IIIC, Summaron 35, Ilford FP4

Img 2 – 2014, Leica MP, Noctilux f/1.0, Ilford FP4

Img 3 – 2015, Leica M2-R, Summicron 35 ASPH, Ilford FP4

Img 4 – 2007, Leica M-4, Summicron 35 ASPH, Ilford FP4

Img 5 – 2015, Leica MP, Summicron 35 ASPH, Ilford FP4

Img 6 – 2015, Leica MP, Summilux 50 ASPH, Ilford FP4

Img 7 – 2013, Leica MP, Summicron 28 ASPH, Ilford Delta 400

Img 8 – 2007, Leica M4, Summicron 35 ASPH, Ilford FP4


Street Photography, it’s about mood and moment not minutiae

What is Street Photography? I believe it’s about capturing life in the street, revealing the drama in the everyday. That’s it. Like any good photograph it needs to exude an energy which resonates with the viewer. It may capture a decisive moment, highlight drama and tension or just pose a question. Daido Moriyama calls this ‘friction’.

selfie with rum

Selfie with bottle of Courvoisier

Many of the acknowledged masters of Street Photography were actually documenting their times and it’s only later their work came to be included within the genre. Atget, considered by many sources the Father of the Street, recorded statues, churches and street scenes he knew would soon pass into history. Walker Evans chronicled the Great Depression for the Farm Security Administration. Lewis Hine concentrated on the Human Document,  photographing immigrant communities in the early 1900’s.

And how Street sits alongside the accepted genres of photography is still an (18%) grey area. One of the classic reference works, ‘The History of Photography’ by Beaumont Newhall doesn’t even have an index entry for Street Photography. My personal point of view is that when the street becomes a road it overlaps with Travel Photography. When it involves a journalistic approach or street portraiture it starts to blend back into Documentary. And that’s fine. I’m happy with blur. Personally I don’t feel the need to box everything into some kind of giant art infographic and get precious about definitions.

man

Man in the machine

However there are some well known and talented photographers who see it very differently. I’ve just finished a book, published in 2014 so presumably reflecting current practice, written by one such traditionalist. He argues that Street Photography must be candid.  This is non negotiable. Anything involving interaction with the subject, changes the dynamics, involves some kind of conscious or unconscious ‘posing’ and therefore isn’t true street shooting. Instead it is Street Portaiture. I understand the sentiment, although images involving eye contact are a grey area and highlight how difficult it can be when we let the urge to control and box everything take charge.

OK the first click was candid. What about the second or third? The subject knew they were being photographed. Did they subtly change their demeanour in some way? So the first is ‘proper’ Street but the second two exposures are Street Portraiture? Yes I’m being picky but if you want to set up ‘rules’ then they have to work.

is it street

This is the second exposure but it’s not a portrait.

Is it Street? Is it Travel? Does it matter? 

How about Margaret Bourke White? She was the first female photo-journalist and the first female photographer to shoot for Life magazine. In 1939, in ‘Changing New York’ she wrote, ‘To make a portrait of a city is a life work and no-one portrait suffices, because the city is always changing, everything is properly part of its story….’ So in her terminology, a whole portfolio of diverse street images came together as a portrait of a city.

I’m sure we could all cope with that ambiguity but unfortunately the rules don’t stop there. The author goes on to state that shooting from the hip is also dubious, too much chance involved. (Walker Evans, please take note, you’ve been doing it all wrong). Cropping the image in post processing is wrong as it should be right first time in the camera. Using a telephoto lens is discouraged as it’s lazy. We shouldn’t even pre-visualise a theme. Instead we should walk in a trance like state responding to our surroundings. For these purists, Street is the almost spiritual hub of all photography.

goodbye

Goodbye

Goodbye. This where I part company. It seems that rigor mortis has set in. Where do these these beliefs come from? Is it Henri Cartier-Bresson?

Certainly he developed an affinity for Zen in his later years after reading ‘Zen and the Art of Archery’ by Eugene Herrigel and spoke of the need to ‘forget you are carrying a camera’. He also famously disliked cropping. Which is fine when reputedly, only one in a hundred negatives make it to the enlarger. Then that one isn’t going to need cropping. As the contact sheets of the great man have never been published, we’ll never know. 

Let’s also remember he didn’t use a light meter, distrusted colour as producing empty effects, never printed his own work and often signed into hotels as ‘Hank Carter’. Should we all do that too?

No, of course not. The fact is that he was one of (if not the) greatest photographic artists of the twentieth century and like many people of genius he had his beliefs and foibles. My feeling is that common practice from the film era, anecdotes and occasional verbatims from the great photographic masters, hearsay and wishful thinking have congealed into a ‘code of conduct’ appropriate to the 1970’s. 

opposite view

Far enough

I take the opposite point of view. There is nothing sacred about Street Photography. Being creative in any genre is hard. Good street imagery is about mood and moment not minutiae.

Get the shot. Use the camera you love, the shooting style which suits you and if you want to, feel free manipulate and share the image with the world. This is not an excuse for sloppy discipline but I am encouraging plenty of creative play in the camera and in the computer.

This may come as heresy to some but photographers have been manipulating images forever. Early landscape photographers joined together separate exposures of the land and sky because the glass plates lacked the dynamic range to imitate painting and hold detail in both. In 1876 Doctor Barnado was sued for fraud because he made up studio sets of life on the street for promotional material. The history books are full of similar examples.

Fast forward to today. Most major camera manufacturers apply lens corrections in their software, it is commonplace to convert colour images to black and white and the widespread use of apps shows that retouching is now part of everyday image making.

Think about it. The whole notion of applying rules to an art form which is frequently about impromptu ‘decisive moments’ is bizarre. 

improvements underway

Improvements under way…

So, hopefully liberated from half a century old ideas, safe in the knowledge that there is no absolutely right way to create a photograph let’s take that first single step out into the street and hope that ‘improvements are under way’……

In part 2 of this series I’ll be looking at what I believe makes a good street shot and beyond that at different shooting styles.

PS: Street can be a divisive and emotional subject. There are no eternal rules of right and wrong. All artists and genres of art shapeshift through time and this article simply represents my opinion at this moment. I appreciate that your views may vary and that’s fine.

Tech note: all images with Leica M series cameras.

Olaf Willoughby

Olaf and Eileen McCarney Muldoon are co-teaching a Street Photography workshop, “Destination Brooklyn, Unlocking Mysteries”, Sep 21 – 24th.

email me at: olaffwilloughby@gmail.com or more information: https://slate.adobe.com/a/z6nZD

Elliott (New Leica Monochrom M246) High ISO Test by Jono Slack

Introduction

Well, I don’t do this sort of thing, but I have been asked, so I thought I’d do a simple (hah!) comparison between different Leica cameras at different ISO values in black and white. I’ve included:

  • Leica M9
  • Leica M Monochrome
  • Leica M-P (typ 240)
  • Leica Monochrom (typ 246)
  • Leica X (typ 113)

I’ve made a real attempt to keep everything as equal as possible. It seemed to be worth including the X, although it’s an APS-C camera, the 16mp at 23mm is very roughly equivalent to the 24mp at 28 mm full frame.

Methodology

All pictures were taken at f8 (except the Leica X which was at f5.6), and with the Leica 28mm Summilux on the M cameras, and with the 23mm lens on the Leica X. The tripod wasn’t moved between shots, and the camera’s white balance was set to daylight.

The DNG files were imported into Lightroom and cropped – there was no revolving of the files to straighten lines, and no adjustments to noise reduction, colour, white balance, exposure or anything else. The X files were cropped to the same area – which gives about the same amount of pixels – the M9 files are slightly smaller because of the lower resolution of the sensor.

Colour files were converted to black and white in Lightroom with no changes to the channel mixer.

The cropped images were exported to Photoshop CC in groups (as 16 bit tiff files) and combined into one file and saved as a jpg with maximum quality.

Of course, there are lots of different ways one could approach this, but this way seemed to give as level a playing field as I could imagine.

I felt that using a 28mm lens at f8 reduced problems with focusing, and I’ve only used the middle of the frame. It has been suggested that diffraction has set in by f8 (thank you Sean). In fact I used f5.6 on the X for this reason, I also realise that the camera is not perfectly straight on to the dresser – however, as I have used the middle of the frame, and the situation was the same for each camera I feel that it’s good enough to give one a pretty good feel for the high ISO characteristics of each camera.

The image used is shown below (sorry it’s a bit untidy). Below that you can see the combined cameras at each ISO value. NB – the image strips are fewer as the cameras run out of available ISO – for the last image there are two MM 246 images.


ISO 200……………………………………………….ISO 400

200-400_ISO_Monochrome

ISO 800………………………………………………ISO 1600

800-1600_ISO_Monochrome

ISO 3200………………………………………………ISO 6400

3200-6400_ISO_Monochrome

ISO 10,000………………………………………………ISO 12,500 – 25,000

10000-25000_ISO_Monochrome

Conclusion

Sean Reid at ReidReviews.com and grEGORy Simpson at ultrasomething.com have done lots more thorough comparisons.

On the other hand I do feel that the images here show a pretty clear distinction between the cameras. The new camera seems pretty good at 12,500 ISO and useable in most cases at 25,000.

Just a final note – these pictures were taken in low natural light – I’m never very happy with high ISO tests taken in good lighting. The exposure at f8 at 200 ISO was about 2 seconds.

If you enjoyed this article you might like to make a donation to Cancer Research

My wife, Emma Slack, Is doing the 12th Annual Pink Ladies Tractor Road Run in aid of Cancer Research

It’s worth mentioning that Jonathan Slack does not get paid by anyone for writing these articles, which is great for everyone, and fine by him, however, once in a while he adds a link to a favourite charity.

People have been extraordinarily generous in the past, and this year Emma (my wife) is fund raising again. It would be lovely if you could see your way to making a small donation to what is a wonderful cause.

Here is the link to Emma’s Just Giving page:

https://www.justgiving.com/Emma-Slack5/

and here’s the link to the Ladies Tractor Road Run Page

http://www.ladiestractorroadrun.co.uk/ladiestractorrun/Home.html


Elliott: The Leica Monochrom (Typ 246)

Introduction

When Leica announced the Leica Monochrom in May 2012 it was a real game changer. A very bold move which turned out to be an outstanding success. I was lucky enough to take a prototype to China before the launch (http://www.slack.co.uk/slack/Monochrom.html). The code name for the older model was Henri – and so it’s completely logical that the new model has been codenamed Elliott.

The new Monochrom (Typ 246) is based around the Leica M-P(240) with a 24mp CMOS sensor made by CMOSIS rather than the CCD of the old camera. It has a similar stealth livery to the previous model with the sapphire crystal back and no red dot.

01Summilux-M 50mm f1.4 at f16 1/2000 sec ISO 320

It’s worth briefly revisiting the reason for a Monochrome camera before discussing Elliott in detail: Current sensors only detect the intensity of light, not the colour. A Bayer filter is placed over the sensor with a different colour filter over each photo-site. When the image is processed (demosaicing) groups of 4 pixels are examined together and in the context of surrounding groups and the colour is calculated. The filter itself imposes a 1 to 2 stop reduction in the light reaching the sensor, and the demosaicing process reduces the resolution. With a monochrome sensor there is no need for a Bayer filter or for the demosaicing process – in theory one might expect a 4x improvement in resolution, but in practical terms it works out more like a two times improvement.

02

Apo Summicron-M 75mm f2 at f2.8 1/125 sec ISO 6400

03Macro Elmarit R 60mm f4 at f2.8 1/125 sec ISO 500

This article is not meant to be a critical review. My loyalty as a camera tester is to Leica. On the other hand I hope that I’m an honest correspondent, and I won’t say anything that I don’t really believe to be the case or leave out anything which I consider to be important. Of course I do carry out some detailed tests, but I generally keep these to myself. However I spend a lot of time with the camera (in this case around 5,000 images). I try and shoot in as many different circumstances as possible which which I hope to have represented well with the images in this report.

It’s also worth mentioning that many of these pictures were taken with an early prototype camera, and the performance, especially at higher ISO, has improved in the production camera.

04 Macro-Adapter-M with the 90mm Macro-Elmar-M at f4 1/125 sec ISO 320

Improvements over the old Monochrom

So, if the older Monochrom is still popular and produces fantastic results, why do we need a new one? The answer is the same as the reason for the M(240), and it’s worth revisiting the differences between the old and new cameras. First of all I’ll look at it in practical terms – and later on in terms of image quality.

Improvements

  • Faster processor
  • Larger buffer
  • Longer battery life
  • Higher resolution LCD
  • Quieter shutter (without re-cock pause)
  • Less shutter lag
  • Better high ISO
  • Higher Resolution
  • Integrated thumb grip
  • Thumb wheel
  • Improved ergonomics
  • Improved Rangefinder design
  • Focus assist / exposure compensation button

It’s easy to forget the huge practical leap forward from the M9 to the M(240). Leica really listened to their customers and addressed almost every criticism of the older camera. These improvements are all reflected in the new Monochrom, better than that, as there have been a number of excellent firmware updates since the launch of the M(240) and all of these are reflected in the firmware of the new Monochrom. The only disadvantage is that the new camera is about 100gm heavier and 0.6mm thicker.

05

Macro-Adapter-M with the 50mm Noctilux f0.95 at f0.95 1/1500 sec ISO 320

New Features

  • Live View
  • Optional Electronic Viewfinder (EVF)
  • Focus Peaking
  • Focus Assist (zoom focus)
  • Video
  • Matrix/centre weighted/spot metering modes
  • Weather sealing

I’m not a video shooter myself, but I very much like shooting close ups and also using my collection of R lenses (and some other old favourites).

06Summilux-M f1.4 28mm Asph at f8 1/3000 sec ISO 320

Shooting with Elliott

The new Monochrom is a beautiful thing – with the black chrome body and the sapphire crystal screen, with only minimal writing on the body, and much of it engraved but not painted; it’s the epitome of stealth!

This is a wonderfully finished camera – shooting it as a rangefinder, it behaves like all M cameras, but the digital features are unobtrusive and very easy to use.

You can choose whether to have Exposure Compensation directly on the rear thumb dial, or whether to press the button on the front of the camera whilst turning the dial. Either way it shows briefly in the rangefinder.

The Auto ISO is the best implementation I’ve come across in any camera. You can choose the highest ISO, and then either a minimum shutter speed (from 1/2 second to 1/500th), or a factor of the lens’s focal length (4x, 2x and 1x focal length). In Manual mode (where you set both the aperture and focal length) you can choose to have Auto ISO or to default to the last used fixed ISO.

For recognised lenses (either selected manually or via the 6 bit code) the recent M cameras have applied corner shading correction – in the Monochrom there is no colour shift, but it is still used to correct vignetting – of course, any such feature is likely to have some impact on the resolution at the corners. Now there is a new option to switch it off.

07Macro-Adapter-M with the 50mm Noctilux f0.95 at f1.8 1/3000 sec ISO 320


Just like the M(240) the new shutter on the Monochrom is both much quieter and with less lag than that of it’s predecessor, without the twangy re-cocking sound of the older camera.

One of the criticisms of the previous monochrom was that, despite the magnificent resolution, it was very hard to estimate the actual sharpness of an image on the rear LCD because of it’s low resolution – the new LCD, just like that of the M(240) allows accurate assessment of the sharpness of your image before downloading to the computer.

I’m not a video shooter, so I’m not in a position to discuss the advantages and disadvantages of shooting monochrome for video, or to assess the video quality of the Monochrom.

The rangefinder itself has been much improved for the M(240), and of course these improvements have come to the new Monochrom. Much tighter manufacturing tolerances combined with automatic rangefinder calibration (rather than hand done calibration) means much improved focusing.

08

Summilux-M 50mm f1.4 at f2 1/125 sec ISO 400

For most purposes I’d prefer to shoot an M camera using the rangefinder, but there are circumstances when it’s great to be able to frame an image on the rear LCD (for instance with a lens wider than 28mm) or to use focus peaking or focus assist. For me the real advantage of the live view features on the new camera is the ability to use wide and long focal lengths, Leica R and third party lenses, and most of all the ability to shoot close up, which is something which was not really possible with the previous Monochrom.

I’ve spent a lot of time using the Macro-adapter-M – both with the dedicated Leica 90mm macro-elmar, and also with other M lenses (there’s something very special about shooting the Noctilux with the macro adapter!). It would be nice if the new camera used the Visoflex EVF found on the new Leica X and the Leica T, but the older EVF works perfectly well for most purposes

09 Macro-Adapter-M with the 50mm Noctilux f0.95 at f0.95 1/90 sec ISO 2000

Image Quality

Comparisons with the previous Monochrom and the Sony A7r (36mp) by Tom Stanworth (http://thephotofundamentalist.com/?p=1938) and with the the Nikon D800e by Ming Thein (http://blog.mingthein.com/2012/05/27/leica-m-monochrom-vs-d800e/) suggest that the original Monochrom was still the reference for high resolution black and white photography.

I’ve done some careful and detailed comparisons of high ISO and resolution with the previous Leica Monochrom and also with the Leica M(240). There are several other reviewers who will be providing detailed image comparisons (see the links at the bottom of this page), so I’m just going to give a generalised idea of my feelings.

10Apo Summicron-M 75mm f2 at f2 1/125 sec ISO 6400

As you would expect, at base ISO the resolution improvement over the older camera simply respects the difference between the 18mp of the old CCD sensor and the 24mp of the new CMOS sensor. However, the higher ISO is a definite improvement. The new Monochrom offers a ‘pushed’ ISO of 25,000 ISO whereas the previous camera was 10,000 ISO, my feeling is that these values are pretty much the same in quality. At lower ISO values the new Monochrom seems to offer a one stop advantage over the original camera, and a two stop advantage over the Leica M(240). Banding is still a possibility at very high ISO, but Leica have been working hard on this, and it has definitely improved considerably over the M(240). 25,000 ISO is certainly useable in lots of situations). What’s more, the lovely tonality is retained at these very high ISO values.

Resolution is stunning, but of course it depends on using the very best lenses, but for me, the real bonus of the Monochrom is the lovely subtle tonality, it’s impossible to quantify, but the images just LOOK lovely. I imagine that there will be a new internet firestorm over the difference between CCD and CMOS sensors (which was previously concentrated around colour response). My personal opinion is that the files from the older monochrom and the newer one look very similar, but the new camera has better ISO and slightly more resolution.

11 Summilux-M 50mm f1.4 at f4 1/2000 sec ISO 25000

DNG File Compatibility

Of course, the excellent JPG files from the Monochrom are supported by all relevant photographic programs, and the DNG files are supported well by both Lightroom 5, 6 and CC (I haven’t tried LR 4) and by Capture One v8.2. This support also extends to  Yosemite 10.10.3. without crashes or issues.
Apple support is more complicated. Yosemite 10.10.2 does not have support for the files, Yosemite 10.10.3 has just been released. The new CoreFoundation raw file support has a bug and crashes when trying to load the Raw files – this is potentially quite nasty.
Photos is the new Apple photography program, just released with 10.10.3: Once you have tried to load a Monochrom DNG file then the library will crash continually on loading. The only way I have found to fix this is to delete the library and restore from a backup (or to start a new library).
Aperture will also crash continually, in this case the only way to re-load the library is to delete the DNG file(s) you have imported (which can be a problem if you use ‘managed’ files rather than ‘referenced’ files); moving the files is not enough.
iPhoto simply will not load the files (but does not crash). However, you should not convert your library to Photos until this has been fixed.
The Apple finder  doesn’t show a preview of the file (no crashes).
This has been confirmed as a bug in the Apple CoreFoundation – they have said to Leica that this will be fixed in the next release – in the meantime:
If you are running Yosemite 10.10.3 or 10.10.4 pubic beta then do NOT load the DNG files into either Photos, Aperture or iPhoto or you may not be able to reopen your photo library.


12


Apo Summicron-M 75mm f2 at f2 1/60 sec ISO 1600

13

Summilux-M 50mm f1.4 at f2.8 1/90 sec ISO 500

Conclusion

The new Leica Monochrom (Typ 246) is a worthy and capable successor to the previous model, and it shows real improvements at every level; it’s faster, quieter, more flexible and has better image quality, especially at high ISO.

In addition to this it has Video capabilities and Live View together with the capacity to use a whole host of new and old quality lenses with the use of adapters. It works wonderfully with the new Leica 90mm Macro Elmar M and the Macro-adapter-M and also with legacy Leica R lenses.

With the new options for Auto ISO, together with the exposure compensation on the rear dial and the excellent high ISO, the camera is fantastic and fluid to use in low light situations such as concerts and bars where the file quality really shines.

For me it’s also a wonderful companion for landscape and nature photography (path photography as Jesko called it). It’s flexibility means that it can be handheld at any aperture in almost all circumstances. I’m sure that a lot of street photographers will find it their weapon of choice for many years to come.

I have kept my testing shots to myself. If I’ve disappointed – or if you would like some really detailed analysis of the files, then you should visit ReidReviews (http://www.reidreviews.com) and ULTRAsomething photography (http://www.ultrasomething.com/photography/).

Sean Reid has been doing side by side tests of the M9 Monochrom, the M-246 Monochrom, the M-240 and the Sigma SD1, and grEGORy simpson who wrote the popular “Fetishist’s Guide to the Monochrom” series of articles, is at it again with the new M-246.

14

Summilux-M f1.4 28mm Asph at f8 1/250 sec ISO 320

Remembering 9/11 – A New Perspective by David Knoble

We waited in line, checking pockets, removing belts and placing all objects in a container for scanning. The room was full of chatter as we walked through the gates. Assembling ourselves back together, I realized one of the sacrifices we now all made. Part of the price of feeling secure is loosing a little freedom. That was when I decided to shoot something unique, something more than just a postcard or pictorial of this 9/11 monument. I wanted something that depicted the emotion I felt while standing on this ground sanctified by so many.  I wanted to show the emotion that those people must have felt that fateful day.  I created the portfolio Remembering 911. Link here.

For my age group, the attacks of 9/11 were the overbearing loss of life that we viewed as it happened in real time. I remember other events as a child and many more from history lessons with wasteful loss of life, but none I experienced this close.  Visiting those historical sites is moving, but nothing evokes my emotion like 9/11.  I now understand my parents statement, “I remember where I was and what I was doing when Kennedy was shot…”  This site carries a somber meaning to me both as a human being and a citizen of the country.

As we entered the memorial, I noticed how quiet it was.  Surveying the area, I found a rose set in someone’s name and made the image permanent. I was using the Summilux-M 35mm wide-open keeping the depth of field to a minimum. The FLE version of this lens allowed me to remain close to the subject producing smooth bokeh while the rose remained sharp.

The RoseThe Rose

I kept taking images of the two large fountains.  Four sided cubes with water falling from every side to a large square drain in the middle, these occupied the foundations of the former Twin Towers.  The black sides of the fountains were stark in the shade of the tall office building across the street.  Shutting my eyes, I could hear the white noise resulting from the falling water.  I imagined the tears of those trapped in the top floors of the Twin Towers.

After clicking a few quick images of the hole in the center of the drain, I pulled the focus back to the reflections of the skyline contained in the water at the top.

The Lone Fountain CoinThe Lone Fountain Coin

Then I pulled back again to focus on the names that were written in engraved stone surrounding each fountain.  As the Vietnam Memorial came to mind in Washington, DC I decided I liked the names surrounding the fountain.  It was almost like a gathering place for their memories.

HerosHeroes

Reviewing the images, a realization came that I needed to show the intimate connection of the monuments and the people there.  I wanted to include enough of the people present, but not take away from the focal point of the memories.  The images had to speak of the silence all around.  I came back to that somber feeling.  I thought again about the tears in people’s eyes at the tops of the towers, waiting for help that didn’t come.   Some, I imagined, were crying as they determined how to meet their fate.  I could picture them looking down the building towards the ground but not being able to see through the smoke.  I decided to represent the tear filled eyes through the outstanding bokeh of the Leica lens.  I decided to represent the smoke through the sharp shadows of this sunny day.

Hushed ConversationHushed Conversation

I started taking images of shadows from the people surrounding the fountain and their interaction with each other. I looked at other shadows formed on the ground and mid April meant only the Cherry trees had blooms – the other trees had not yet sprouted leaves. I began shooting the shadows of the crooked, and spindled branches on the ground. It reminded me of the needless hand of death, reaching out to those it came to claim.

There was still a fair amount of construction as the visitor’s center was not yet complete.  The chain link fence provided two backdrops.  First, the length of fencing provided a border that people couldn’t cross.  The fence represented containment.  I saw the containment of the people trapped in the tower and our containment now as we look for more security in our life.  Second, the shadow of the chain link also represented the brief time during 9/11 we were trapped as a country.  Planes were grounded causing travel to halt, large cities closed down for safety, New York was barricaded to everyone in and out.  It represented fear then and fear now.      


Fenced InFenced In

There were many heroes that day and in the days that followed, even though many of them perished – and I consider each person caught in that tragedy a hero.  With them in mind, I began taking images of shadows as people entered the frame.  Feet and hands entering the frame from the edges represented the help coming to the Towers.  It represented the bravery and help that the passengers provided to each other when grounding the plane in Pittsburgh.  It represented the aftermath cleaning up the damage to the Pentagon.  This was the connection I was looking for.

There is no question that the Leica M rangefinder was what made this revelation possible for me to photograph.  Even with the 35mm focal length, which fills much of the viewfinder, I still had room to see people entering the image, before they got there.  It gave me the ability to anticipate the moment.  One of my favorite images in this series is the shadow of the tree with two feet entering, one from the left and one from the right.  Are they trying to escape death or are they oblivious to it?  I could not have made this image with a viewfinder that only showed me reality through the lens.

IntrepidationIntrepidation

The Monochrom is my favorite Leica body and I began learning photography with black and white film.  I considered making these images black and white for the focus and tradition of documentary work.  While that was a very easy choice I could make with the M typ 240, I decided the shadows and the black stone of the fountain gave me the dark black I needed, so I continued in color.  In fact, there is one strong color shot that spoke to me – the Survivor Tree.  Aptly named, it was the single tree in the area that lived through the falling of the two large Twin Towers.  In some ways, I wish I had taken more images that day of the tree, but my focus was on the ground.      


The Survivor Tree

The Survivor Tree

As I pulled together the images for this essay, I decided to make one additional choice.  I decided to use the RAW images out of the camera, unaltered in any manner save contrast and brightness adjustments (which most RAW files need).  There is no cropping or color adjustments in these images.  My thinking was that I would show the unaltered view of what I had seen and felt.  While I do not believe altering the images through basic settings changes the craft, similar to film work, I did want an exact replica the way my Leica saved the image.  There is somehow a sense of completeness to my work knowing that I cannot change the image, a sense of finality.

Falling TearsFalling Tears

The sounds of nature.  The sparkle of the falling water.  The creamy background and inability to focus through it.  All this reminds me of the tears shed that day.  I thank the heroes of 9/11 for the strength and patriotism they have given to me through their sacrifice and that of their families.  I will remember.

David Matthew Knoble.